Creating a GridGain 9 Managed Cluster
To provision a new managed GridGain 9 cluster:
-
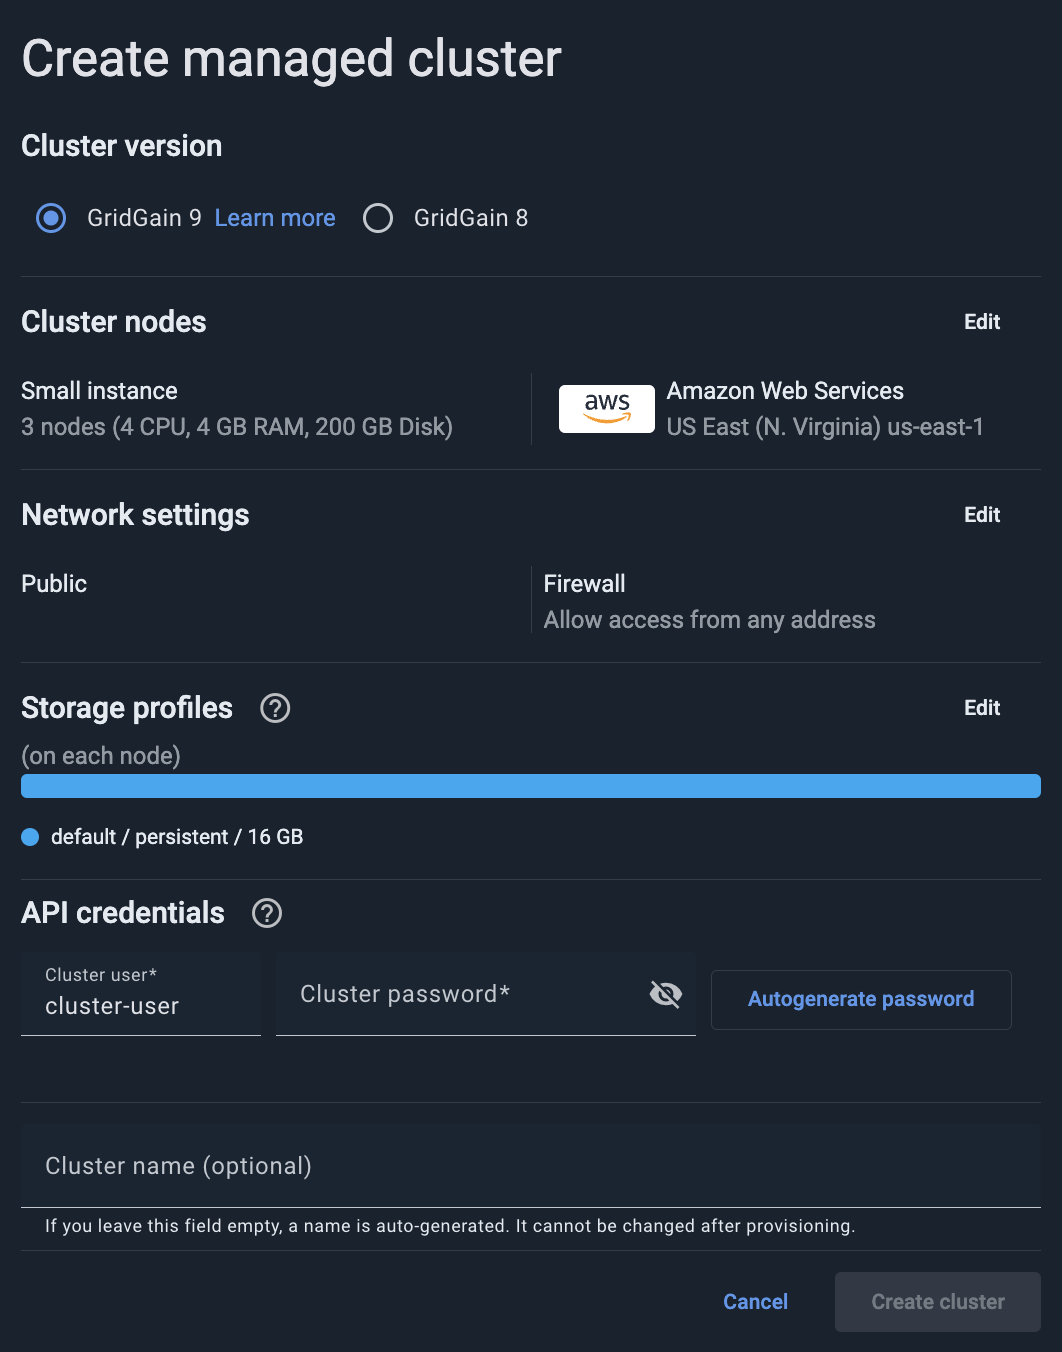
Click + on the main GridGain Nebula toolbar and select Create Managed Cluster.
The Create managed cluster dialog opens.
-
In Cluster version, select "GridGain 9".
-
Optionally, Select Cluster Size and Location.
-
Optionally, Define Network Settings.
-
Optionally, Define Storage Profiles.
-
In the API credentials section, enter the user name and password for the initial user. Applications will use these credentials to connect to the cluster. After the cluster had been provisioned, you can create additional users (API credential sets) in the Cluster management screen or in the My cluster screen.
-
Optionally, enter a cluster name in the Cluster name field. If you leave this filed empty, a name is automatically generated during provisioning.
-
Click Create cluster.
GridGain Nebula starts provisioning the cluster you have requested. Clusters take about 9 minutes to provision.
Select Cluster Size and Location
GridGain Nebula default configuration offers a 3-node cluster and a Small instance. You can modify the configuration. If you are not sure about the size of the instance you need for your environment, contact our support team to calculate the best configuration.
To modify the configuration:
-
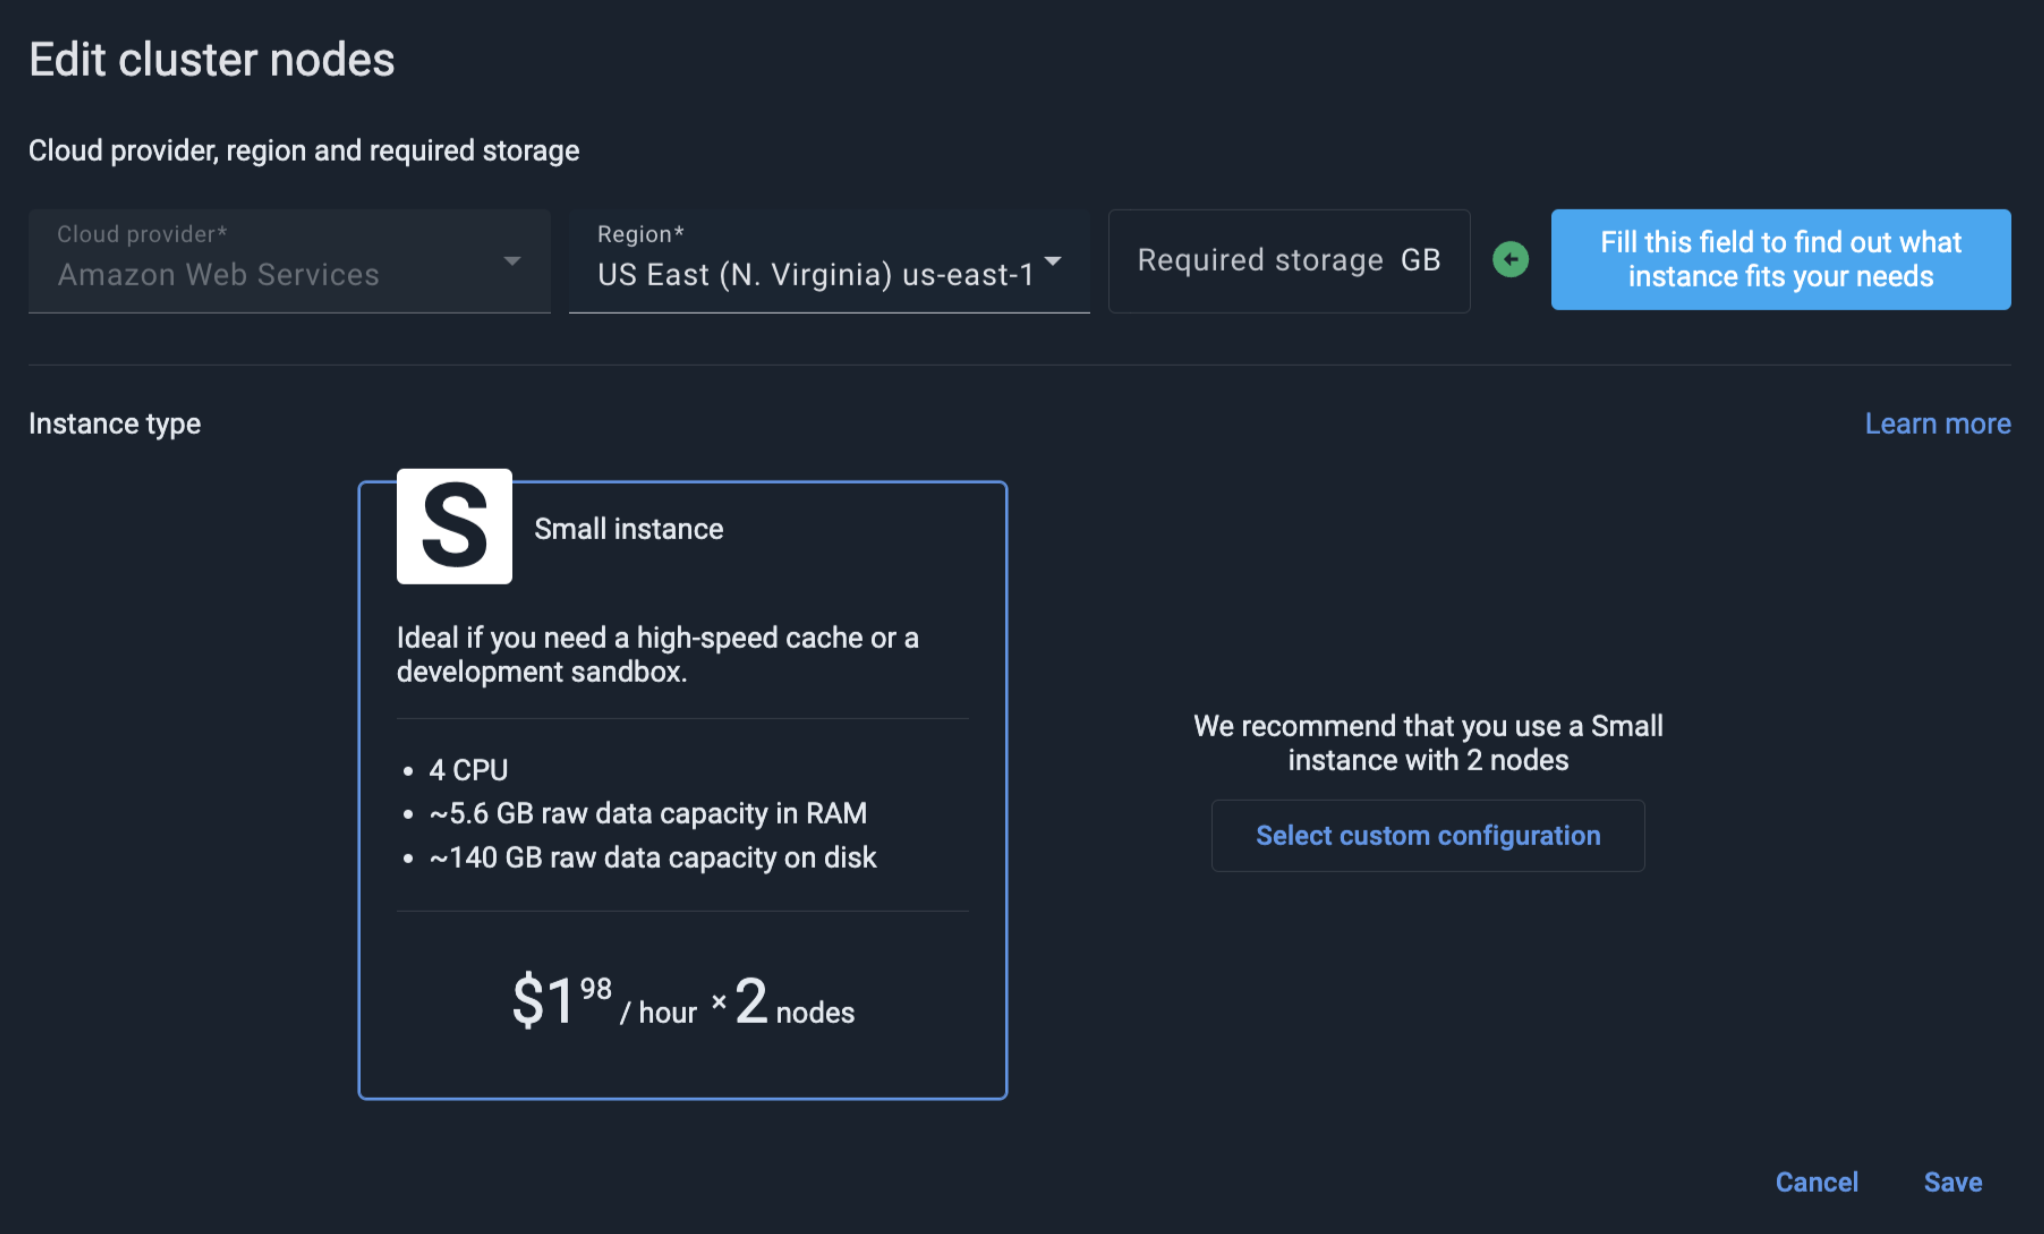
Click Edit in the Cluster nodes section.
The Edit cluster nodes dialog opens.
-
Select the cloud provider and region. For latency purposes, we recommend selecting a region that is closest to your customers. Regions in different parts of the world can lead to high latency.
-
Do one of the following:
-
In the Required storage field, enter the number of Gigabytes your cluster will require.
The Instance type changes to accommodate the storage size you have indicated.
-
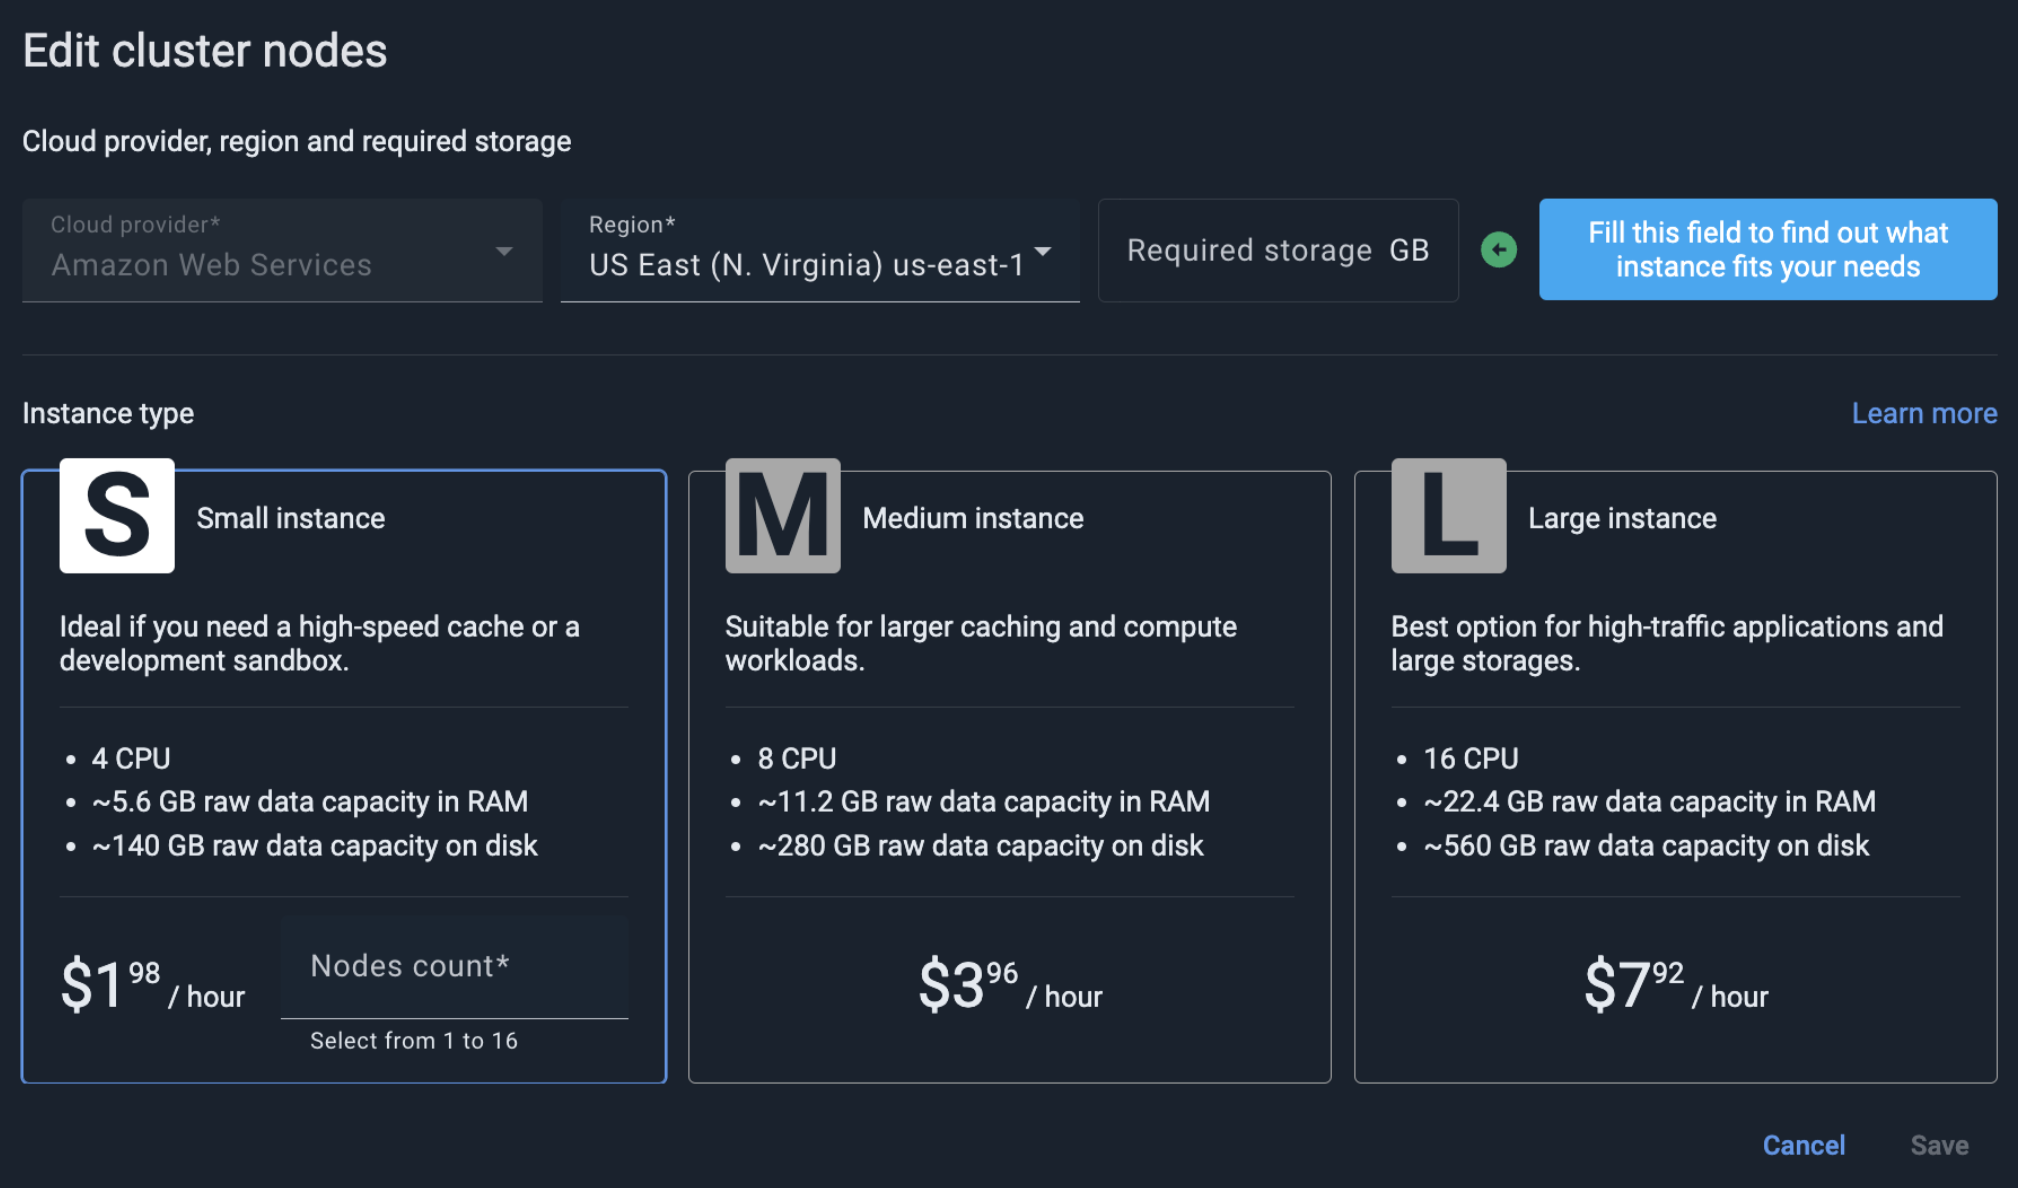
Click Select custom configuration, then make the required selections and modifications.
-
-
Click Save.
Define Network Settings
Access to your GridGain cluster is public - the cluster is accessible over the Internet. To protect your cluster, define a firewall that allows access to it only from specific IP addresses:
-
Click Edit in the Network Settings section.
The Edit network settings dialog opens.
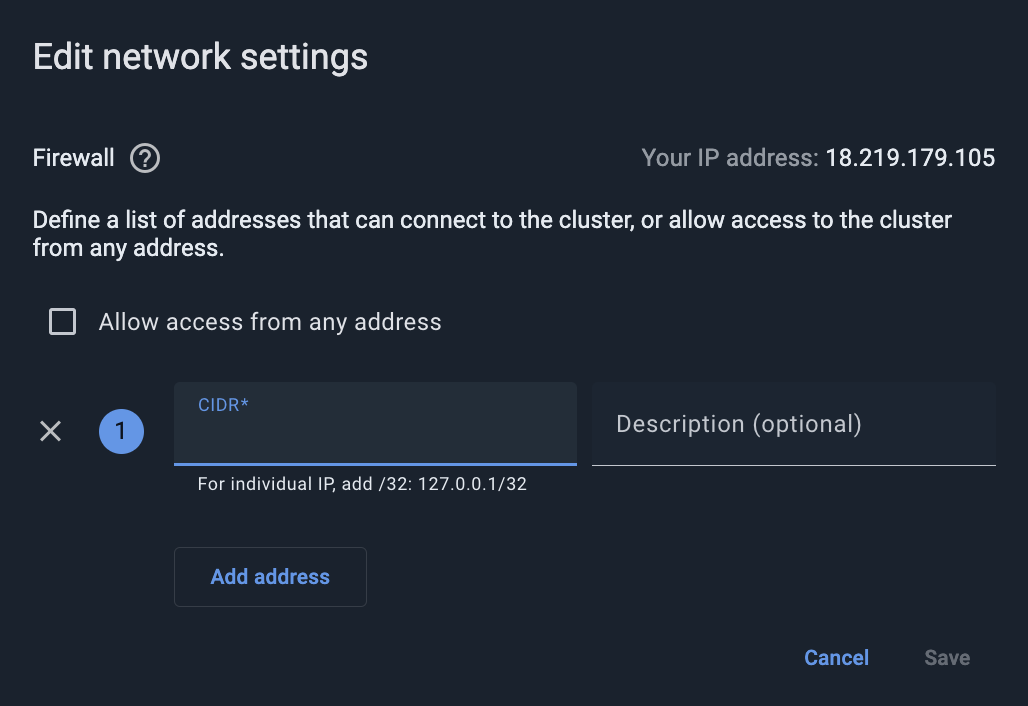
By default, the Allow access from any address check box is selected - this enables access to your cluster from any IP address, even if the real IP address is hidden from GridGain Nebula. This option is not recommended if you plan on working with real data.
-
Clear the Allow access from any address check box.
-
Add the "whitelisted" IP addresses in the CIDR field. Click Add address for each additional CIDR.
-
Click Save.
Define Storage Profiles
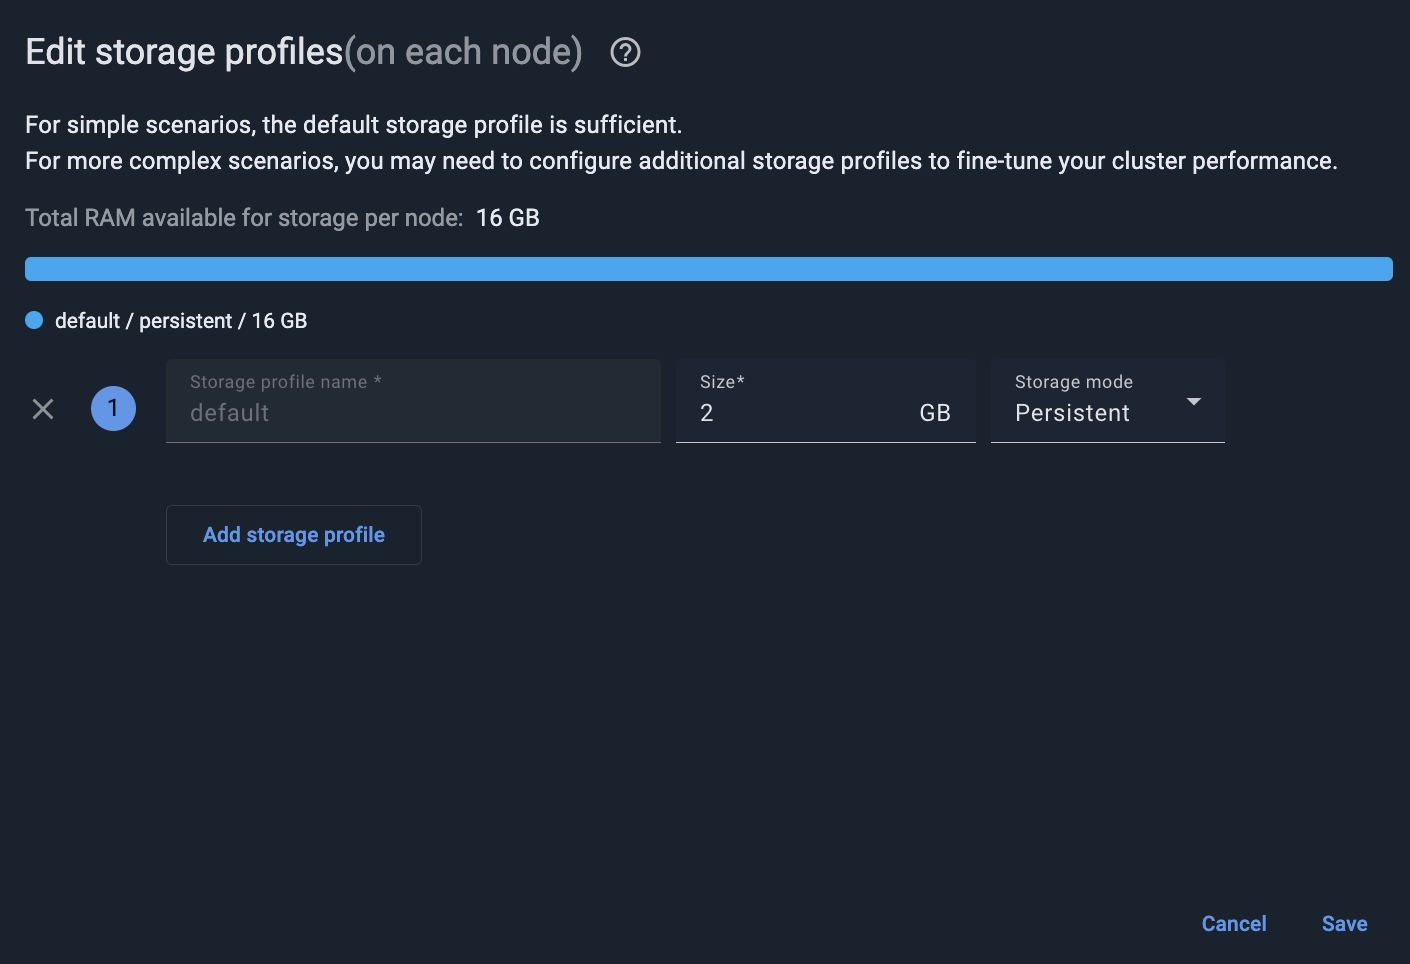
By default, your cluster has a single storage profile, named "default", which offers 2 GB of memory in the persistent mode.
To modify the cluster storage configuration:
-
Click Edit in the Storage profiles section.
The Edit storage profiles dialog opens.
-
Modify the default profile’s Size and/or Storage mode.
-
Optionally, click Add storage profiles and enter the details of additional profile(s).
-
Click Save.
Next Steps - Connect to Your Cluster
Once GridGain Nebula had provisioned the cluster you have requested, you can connect to this cluster with you own clients: Java, C++, .NET client, or .NET LINQ Queries.
The following example addresses a simple Java thin client.
Proceed as follows:
-
Add the following dependencies to your Maven project.
<repositories> <repository> <id>GridGain External Repository</id> <url>https://www.gridgainsystems.com/nexus/content/repositories/external</url> </repository> </repositories> <dependencies> <dependency> <groupId>org.gridgain</groupId> <artifactId>ignite-client</artifactId> <version>${gg.version}</version> </dependency> </dependencies> -
Run your application.
public static void main(String[] args) {
       SslConfiguration sslConfiguration = new SslConfigurationBuilder()
               .enabled(true)
               .build();
       IgniteClientAuthenticator auth = BasicAuthenticator.builder()
               .username("{login}")
               .password("{password}")
               .build();

//Connect to the cluster
       try (IgniteClient client = IgniteClient.builder()
               .addresses("{cluster_address}:10800")
               .authenticator(auth)
               .ssl(sslConfiguration)
               .build()) {
//Use the API
           client.sql().execute(null, "CREATE TABLE IF NOT EXISTS Person (id VARCHAR PRIMARY KEY, name VARCHAR)");
       }
   }
}
Once the connection to your managed cluster is established, the "Person" table is created. You can see this table in the Schemas section of the Queries screen.
© 2025 GridGain Systems, Inc. All Rights Reserved. Privacy Policy | Legal Notices. GridGain® is a registered trademark of GridGain Systems, Inc.
Apache, Apache Ignite, the Apache feather and the Apache Ignite logo are either registered trademarks or trademarks of The Apache Software Foundation.
