Integrating Control Center with PingOne

Control Center allows users to use SSO providers for authorization in the system. Thanks to this, Control Center Administrator may use Role-based access control (RBAC) and assign specific privileges to certain users. Moreover, cluster action permissions also may be checked if the user is authorized via SSO. In this tutorial we are going to use PingOne SSO provider as an example.
PingOne Configuration
-
Firstly, Sign on PingOne and pass the email verification.
-
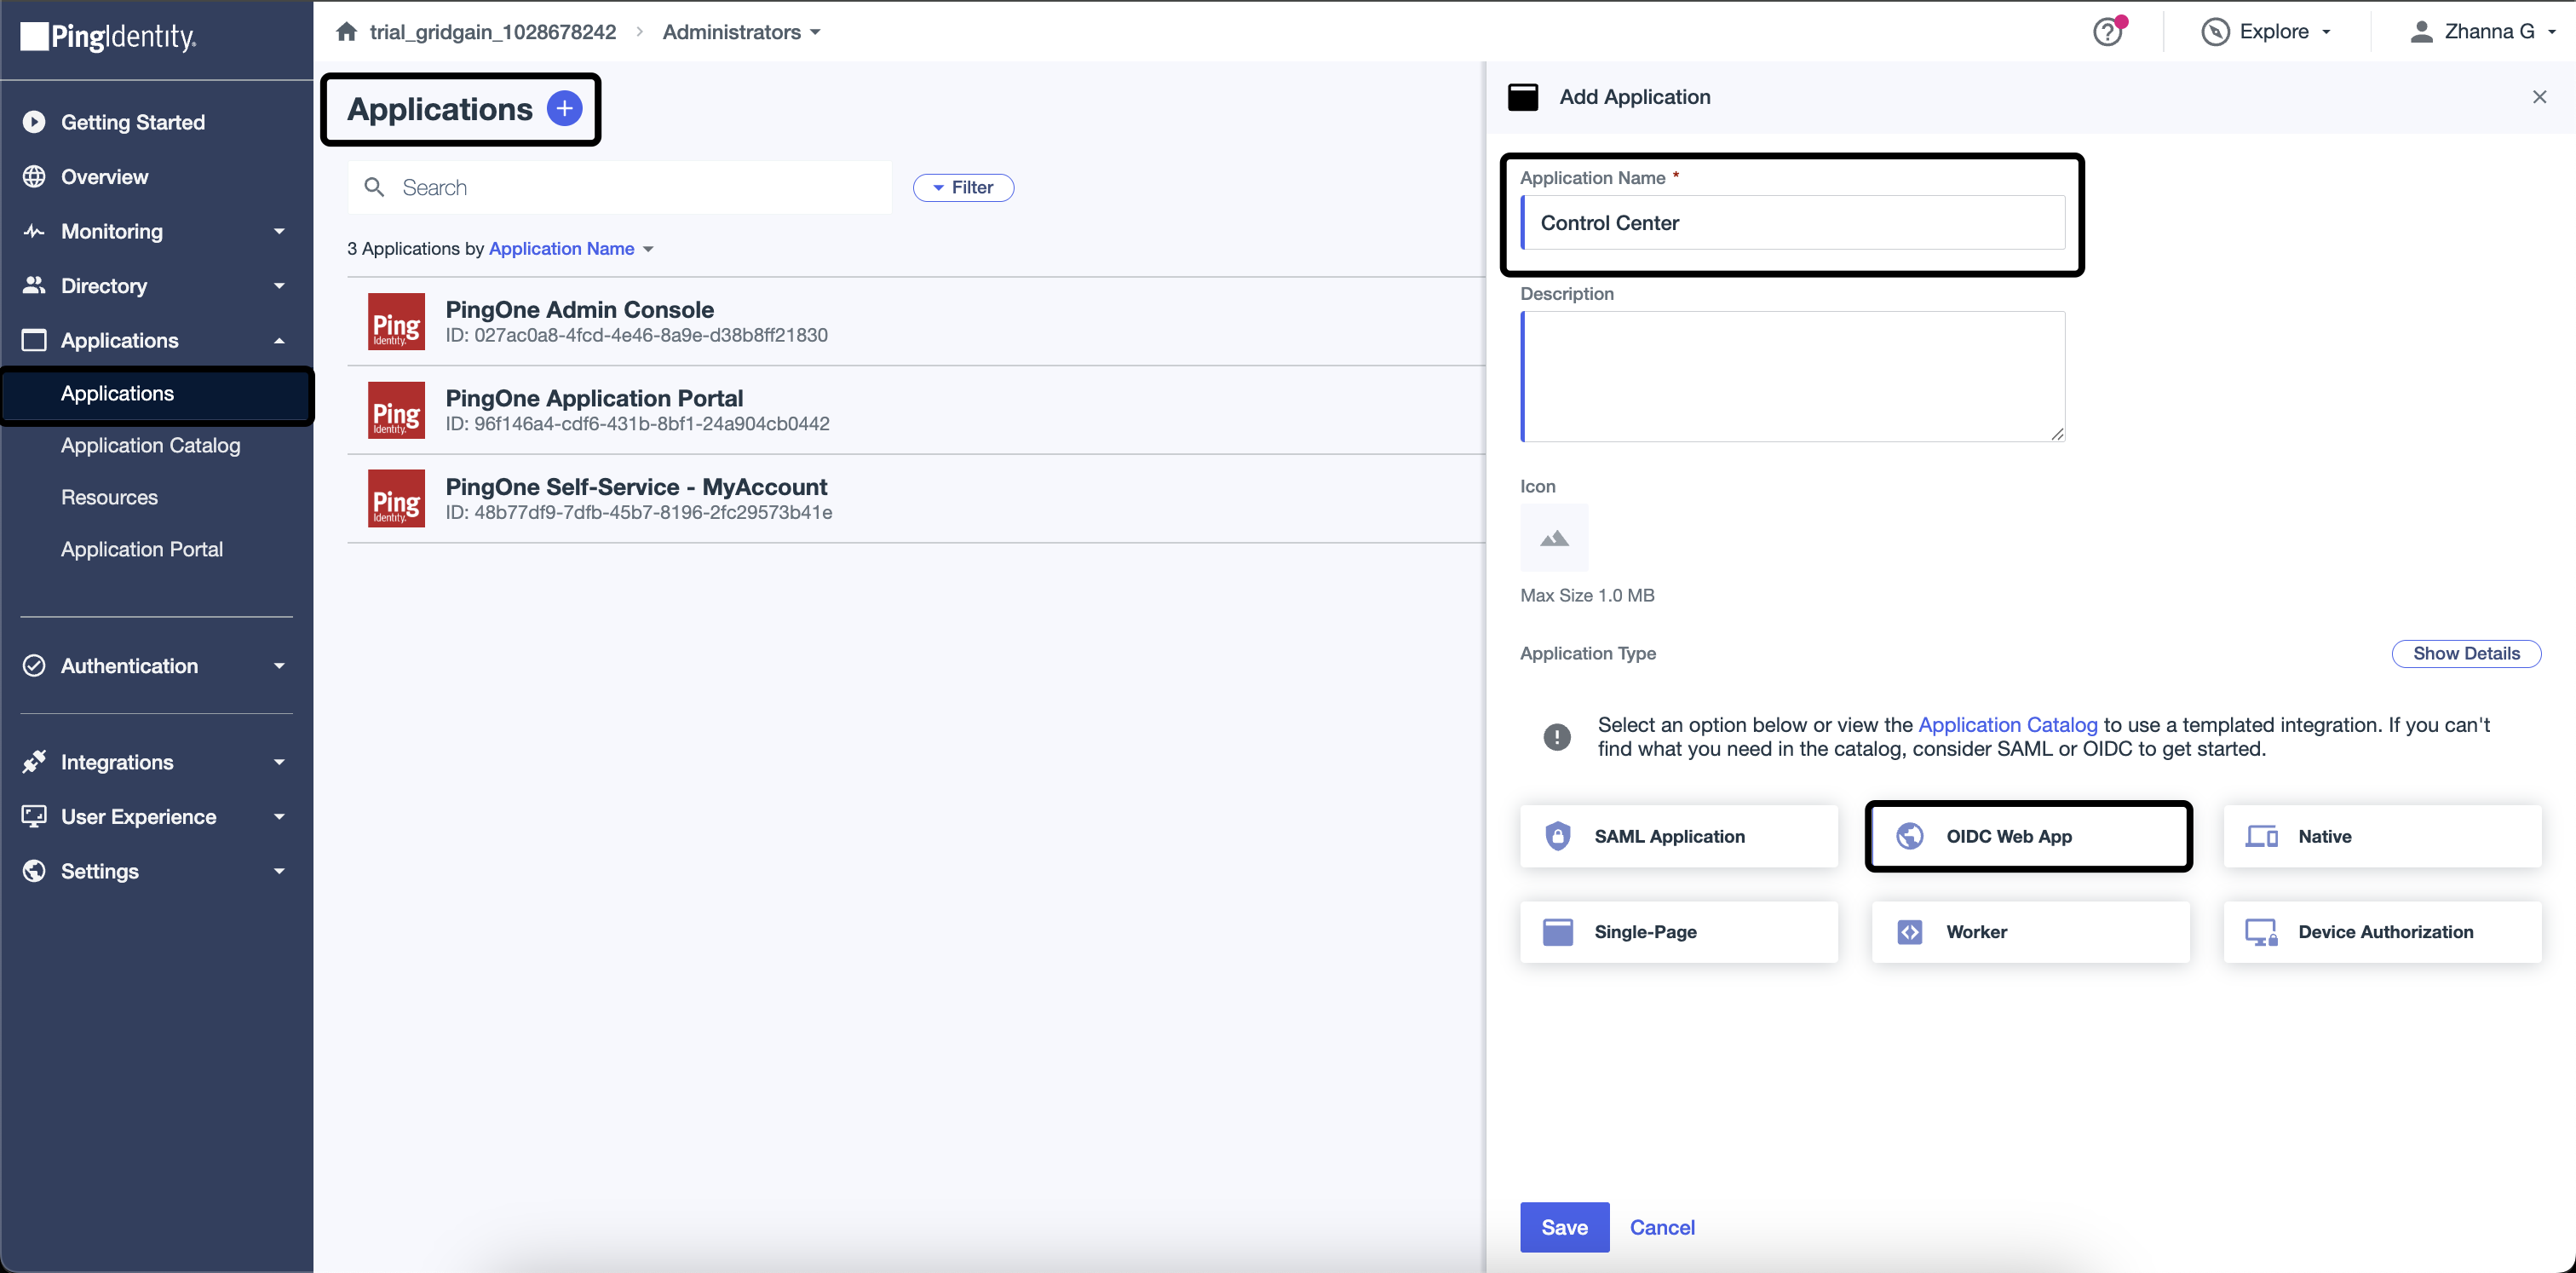
After completing the verification process, proceed to create a new Application. Specify the Application name and choose the OIDC Web App option.
-
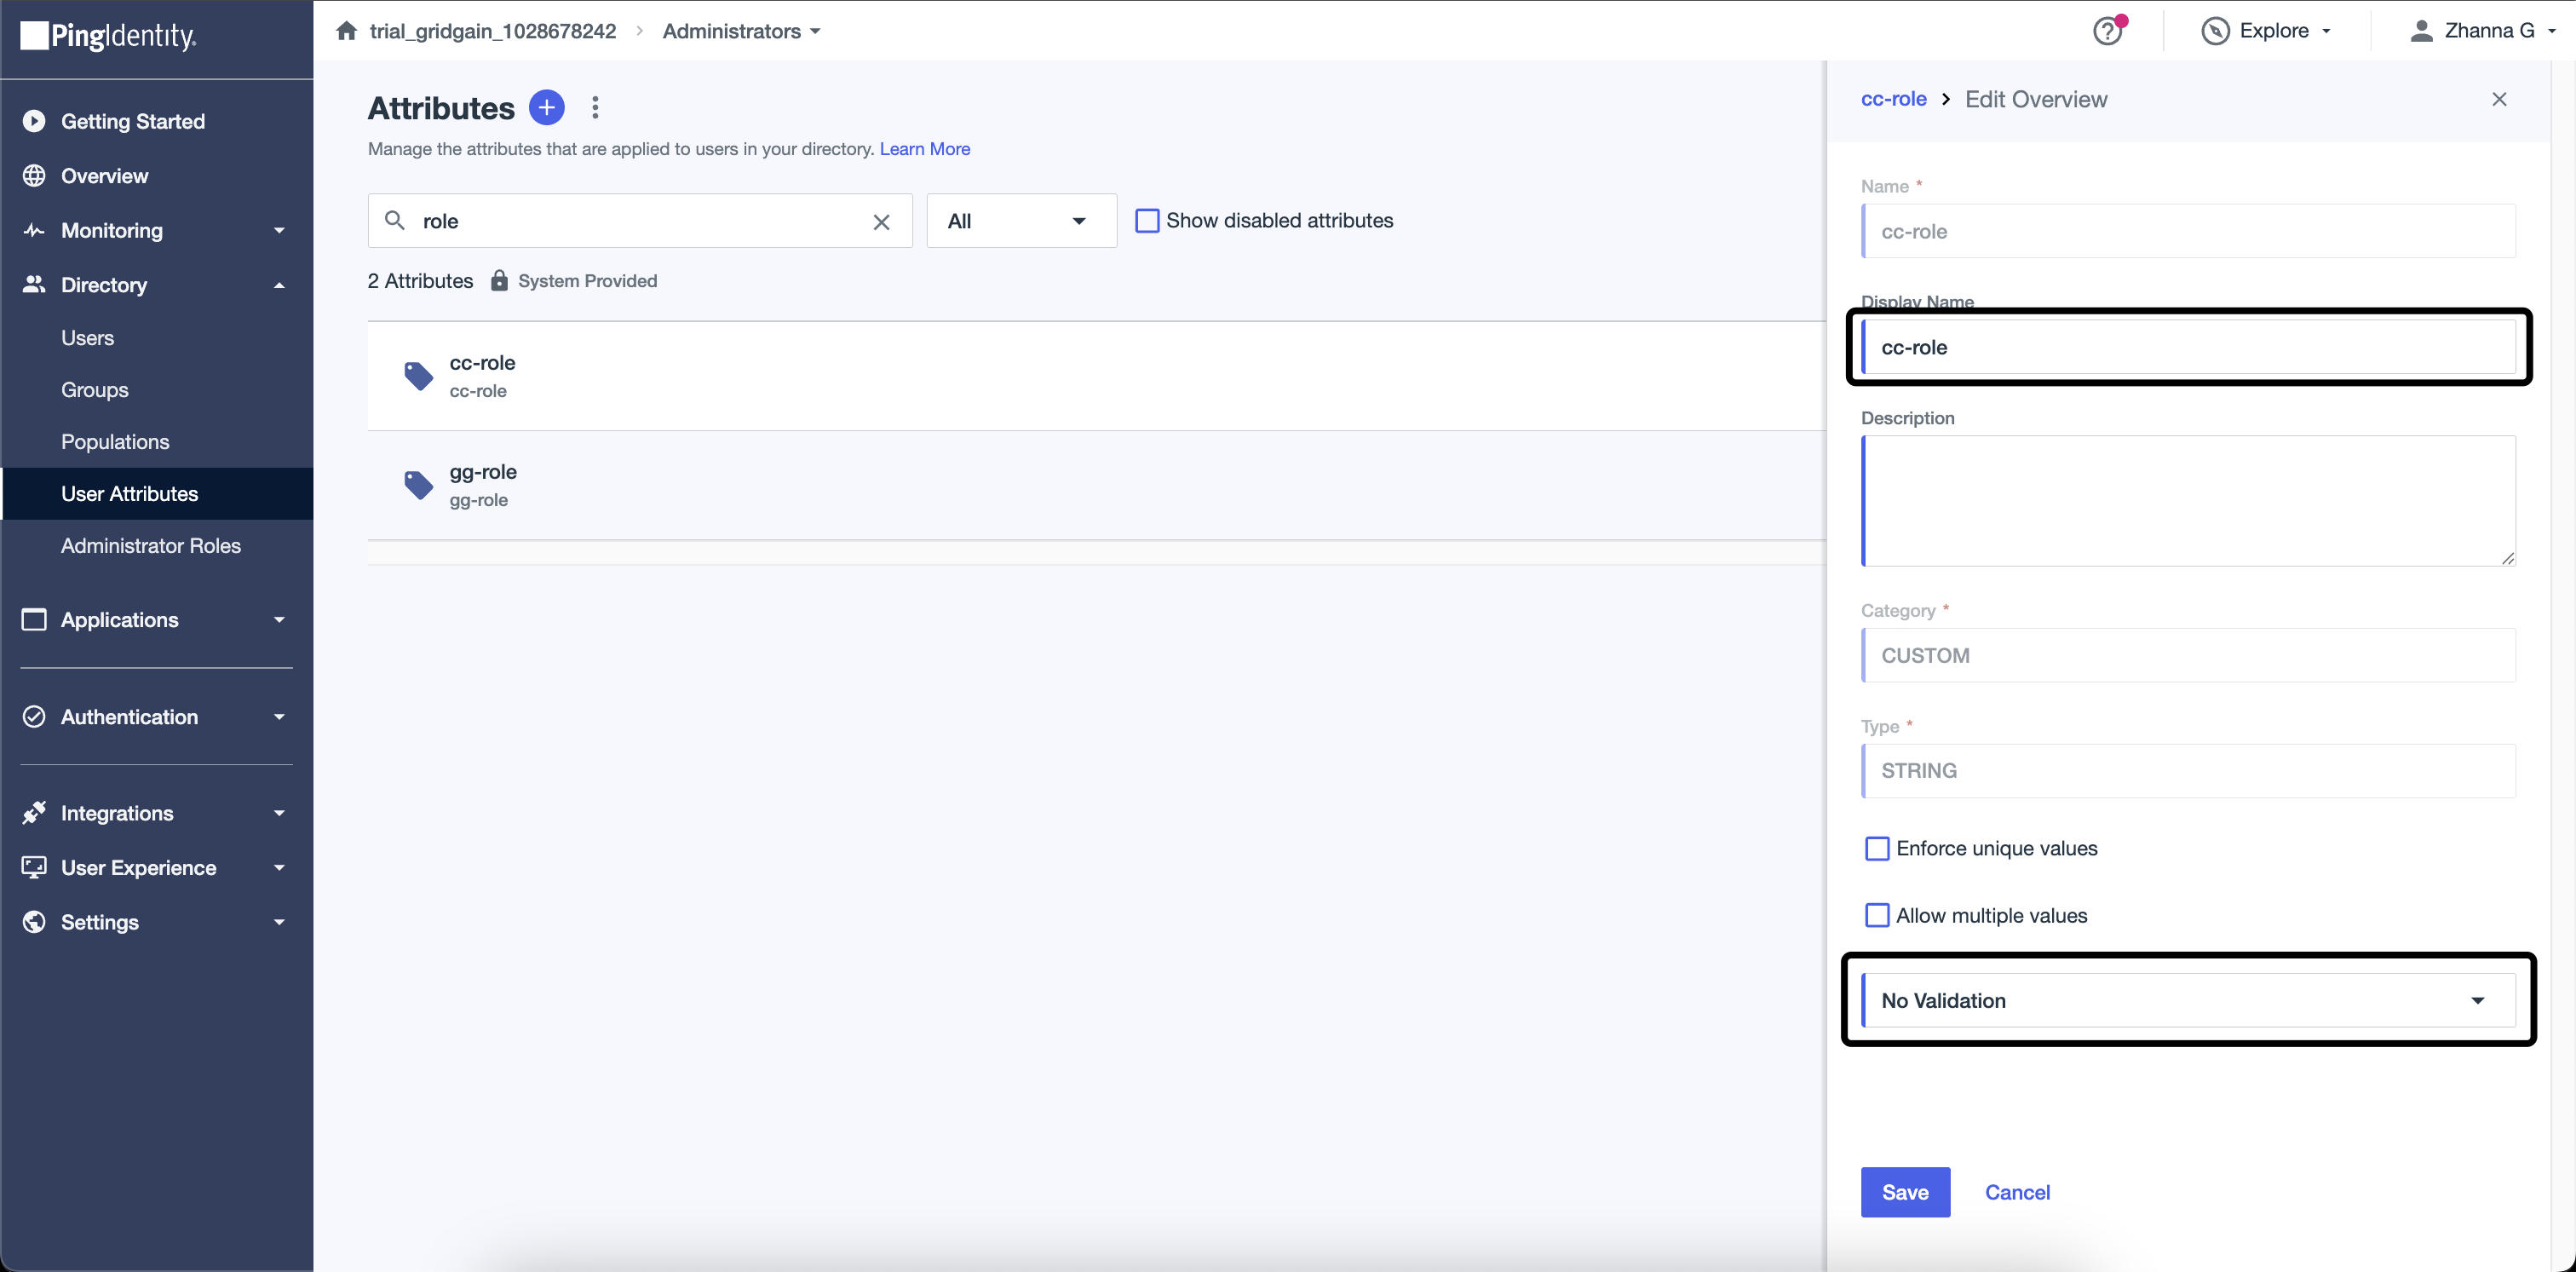
Create two User Attributes :
gg-roleandcc-rolewith No validation option.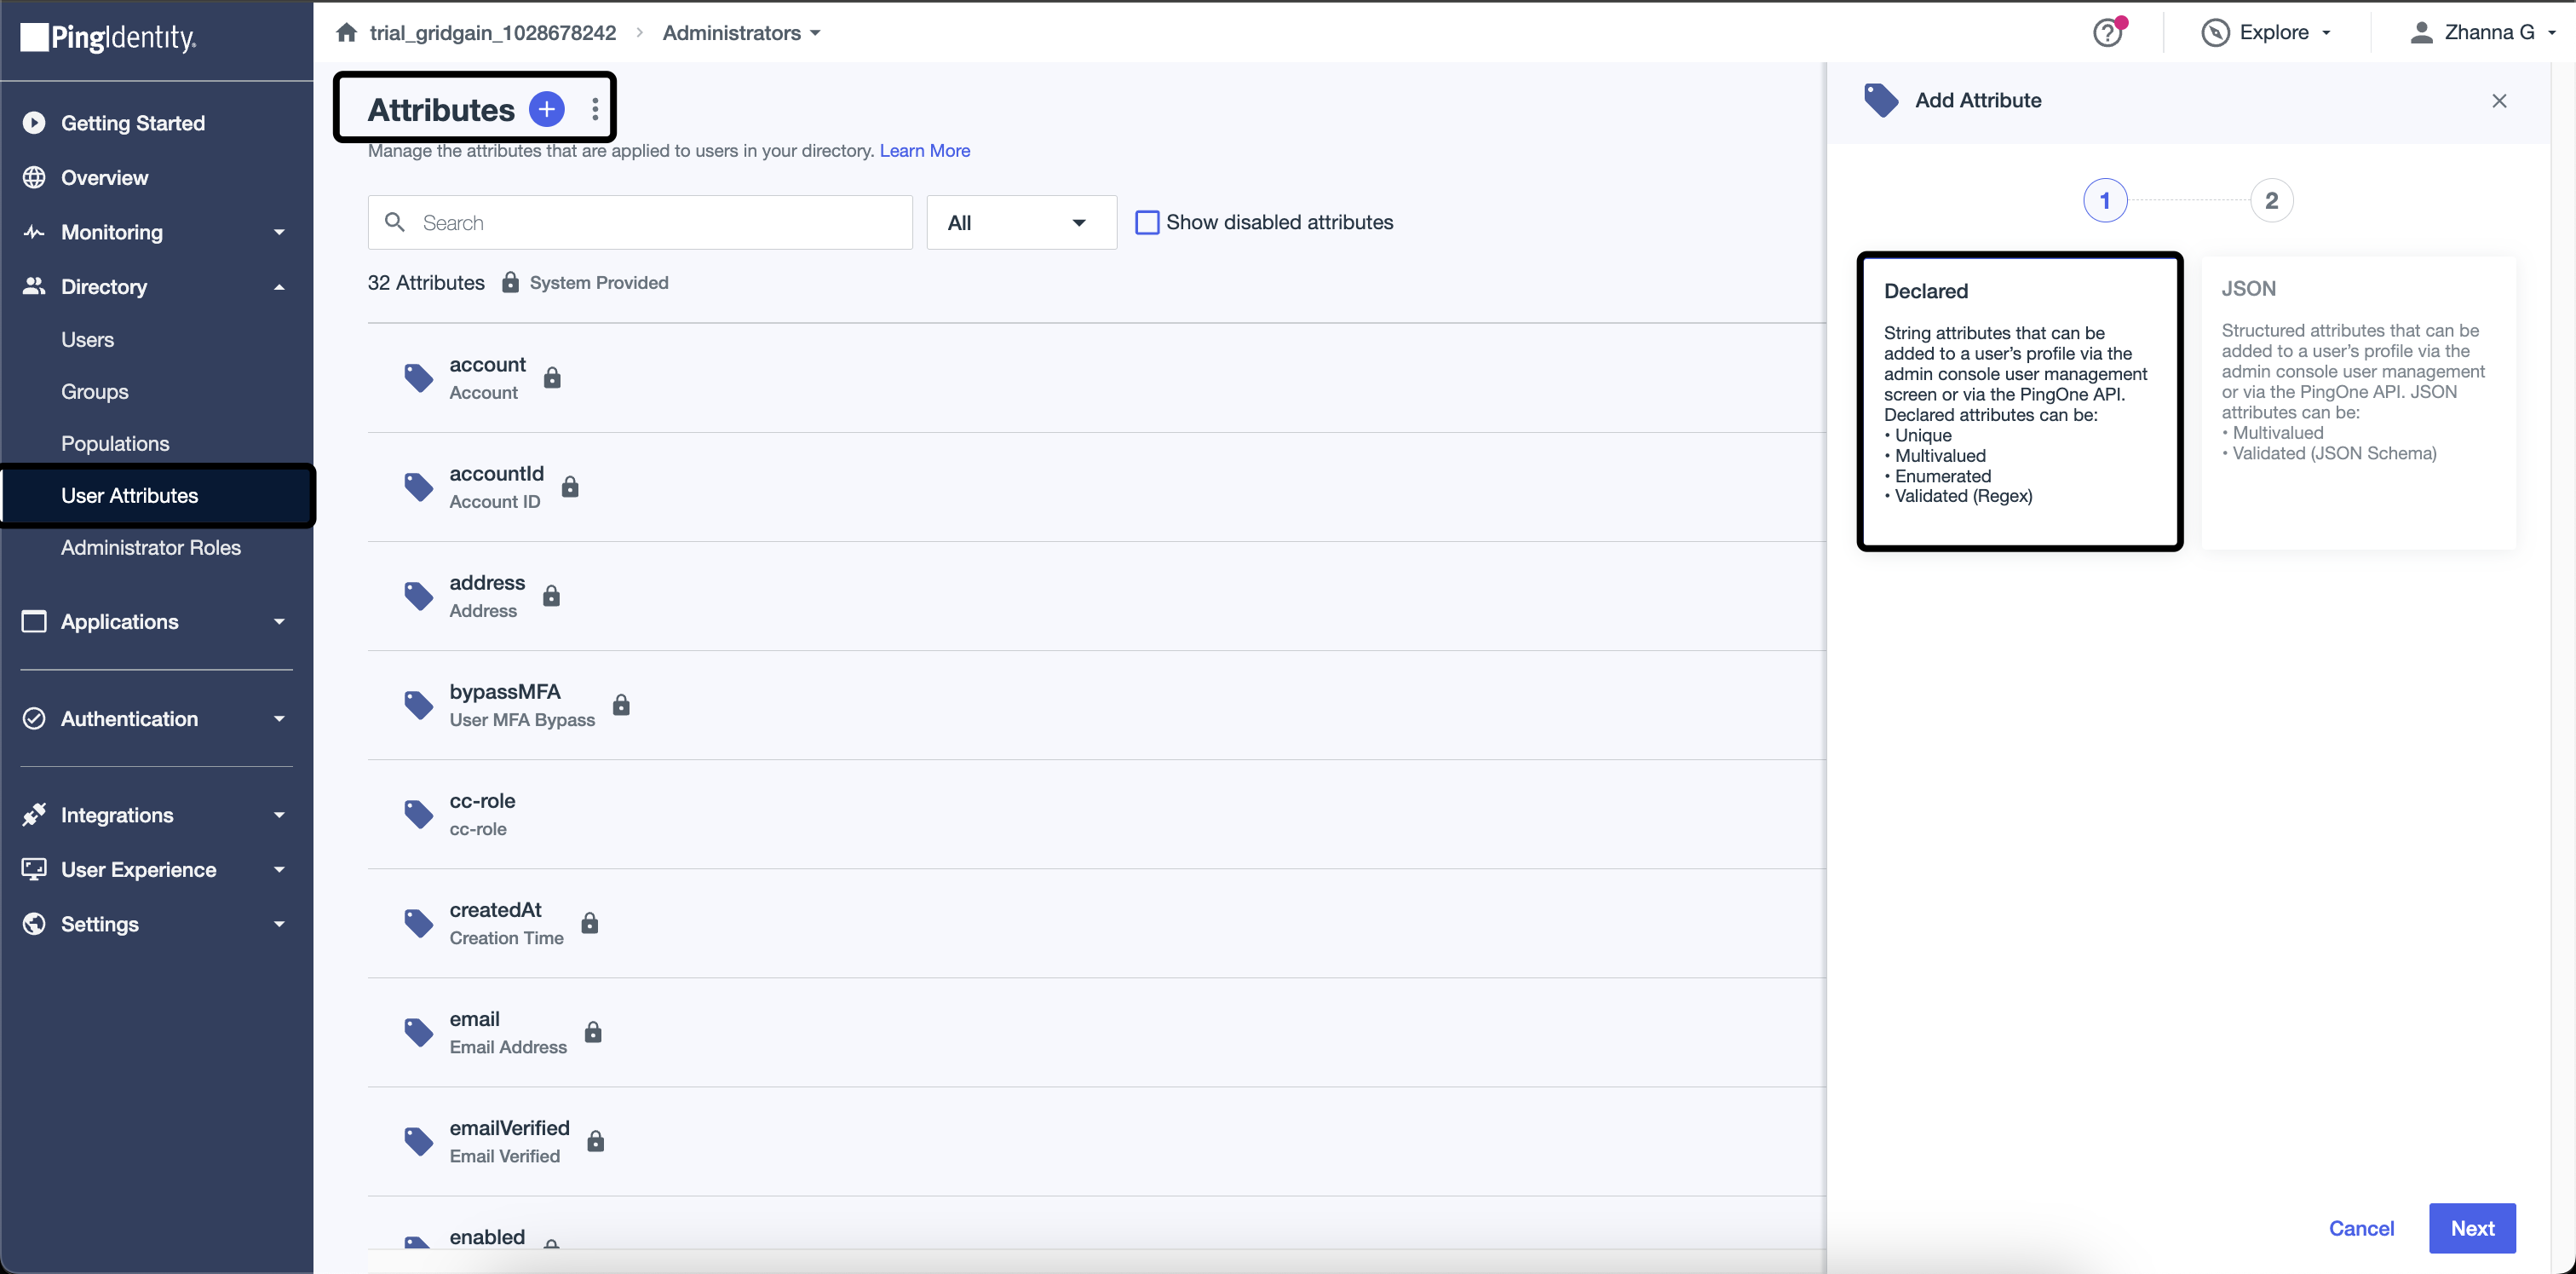
-
Add
gg-roleandcc-rolemapping in created Application. Find Attribute Mapping tab in Application and add mapping in the Custom Attributes section.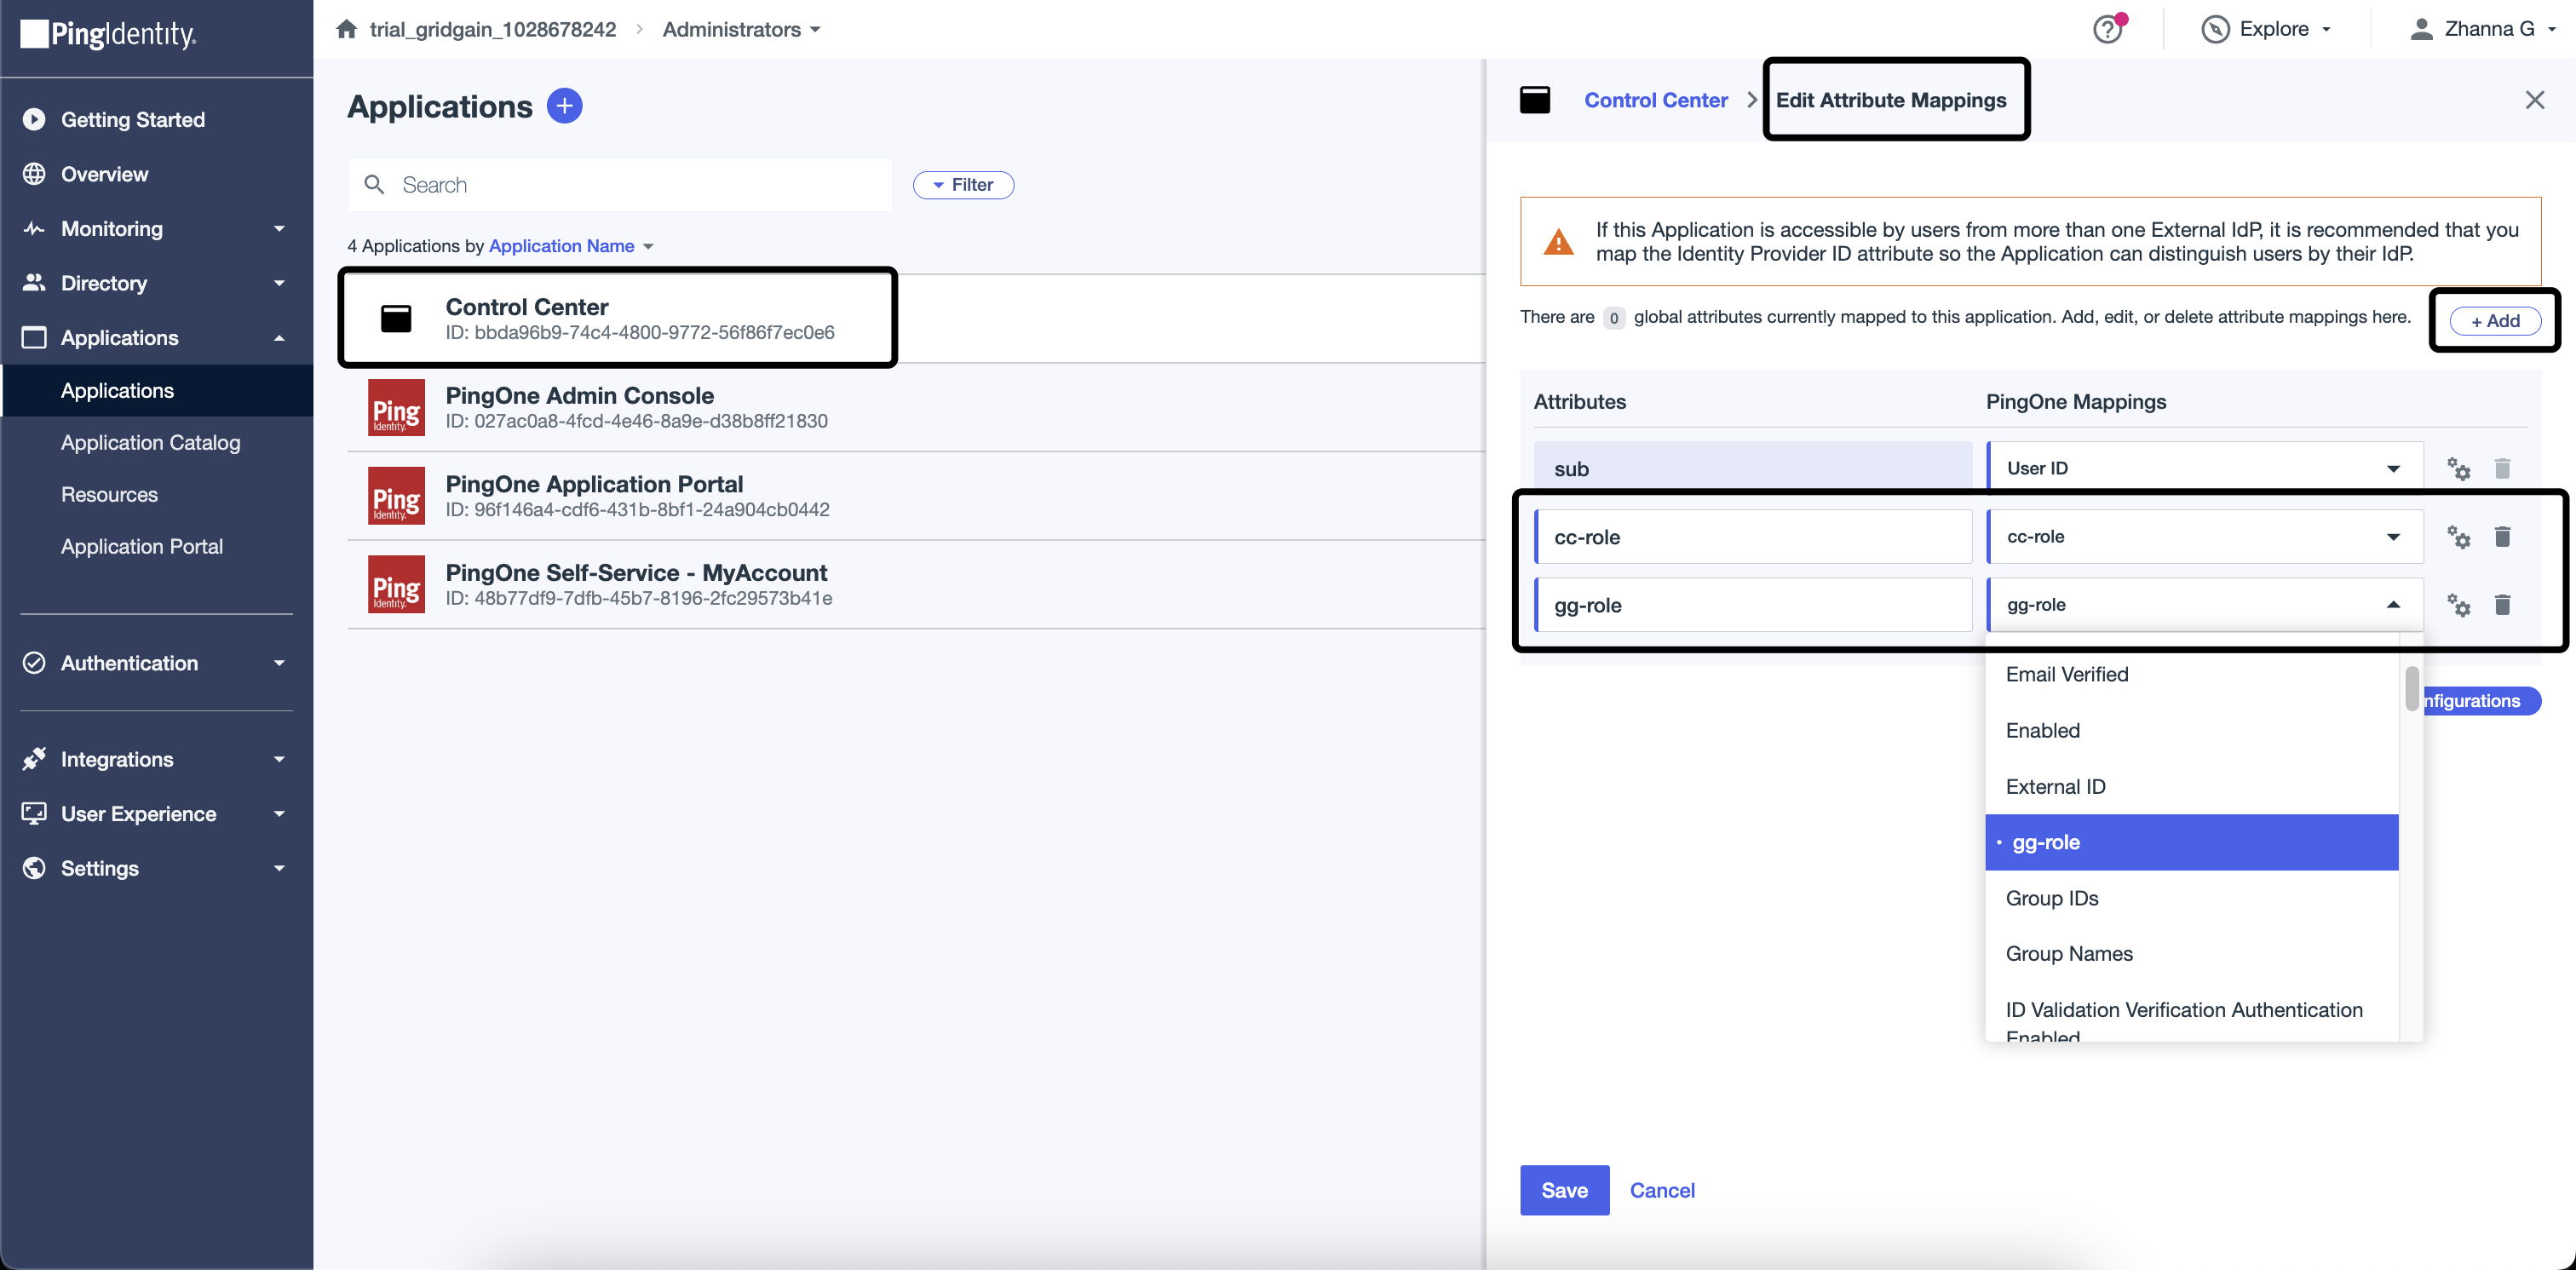
-
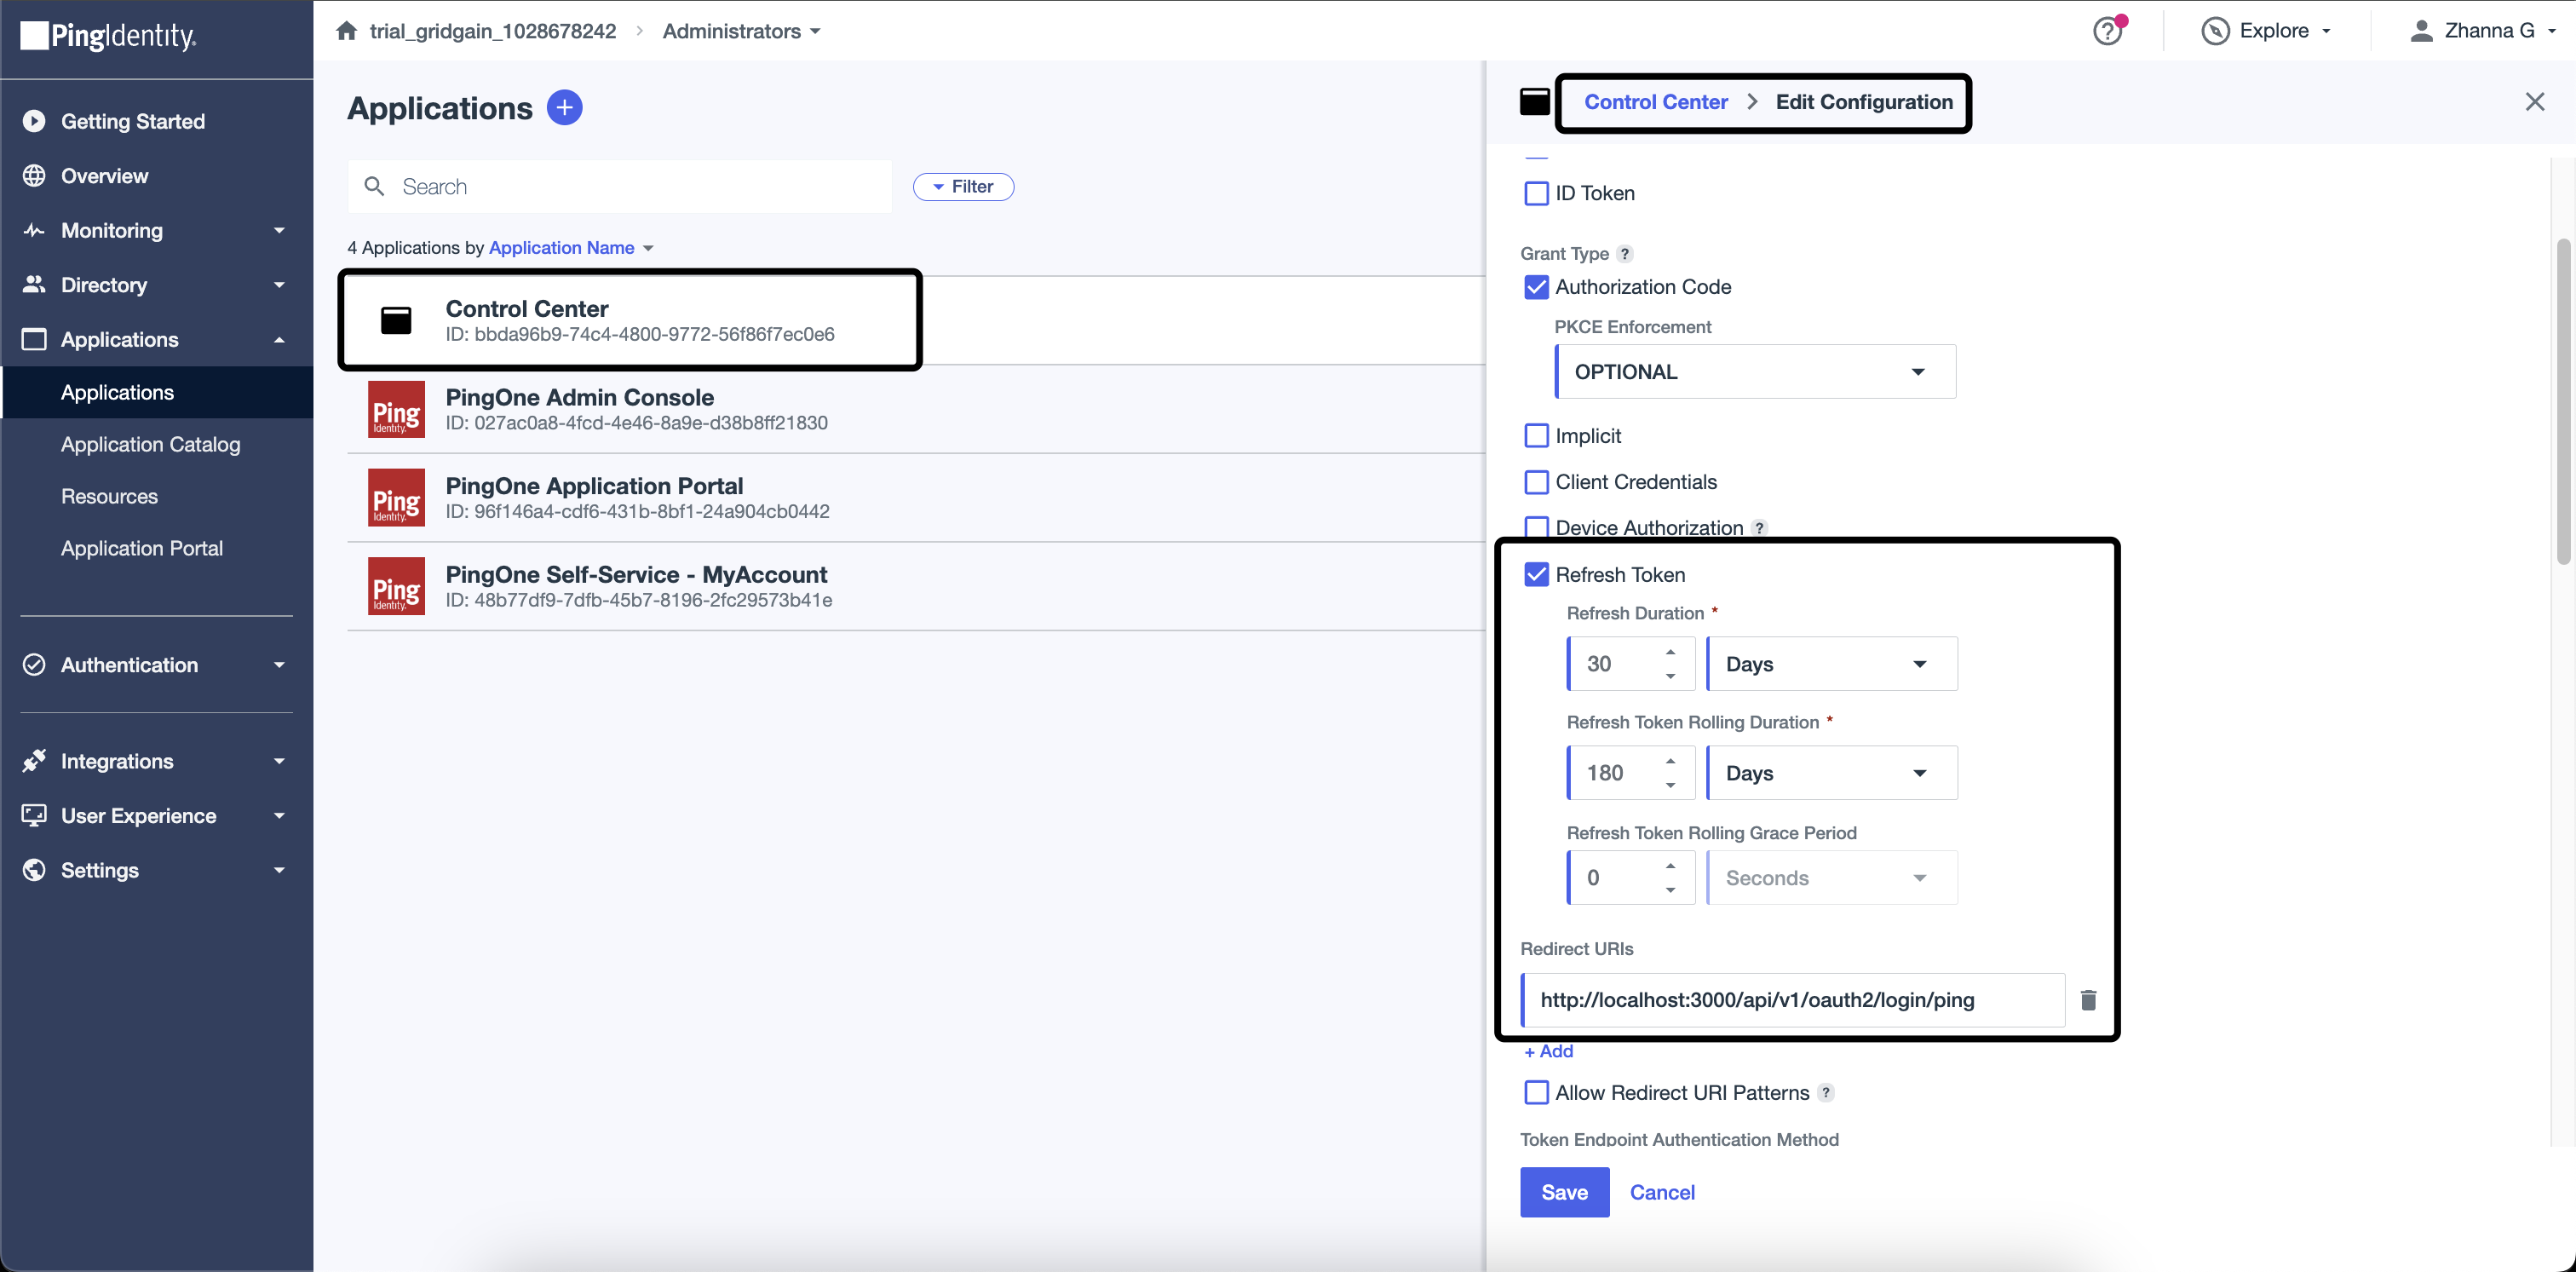
Set Redirect URIs parameter as http://localhost:3000/api/v1/oauth2/login/ping and activate Refresh Token. These parameters are located on the Configuration tab.
-
Assign
gg-roleandcc-roleto the users. User management is carried out through the Users page.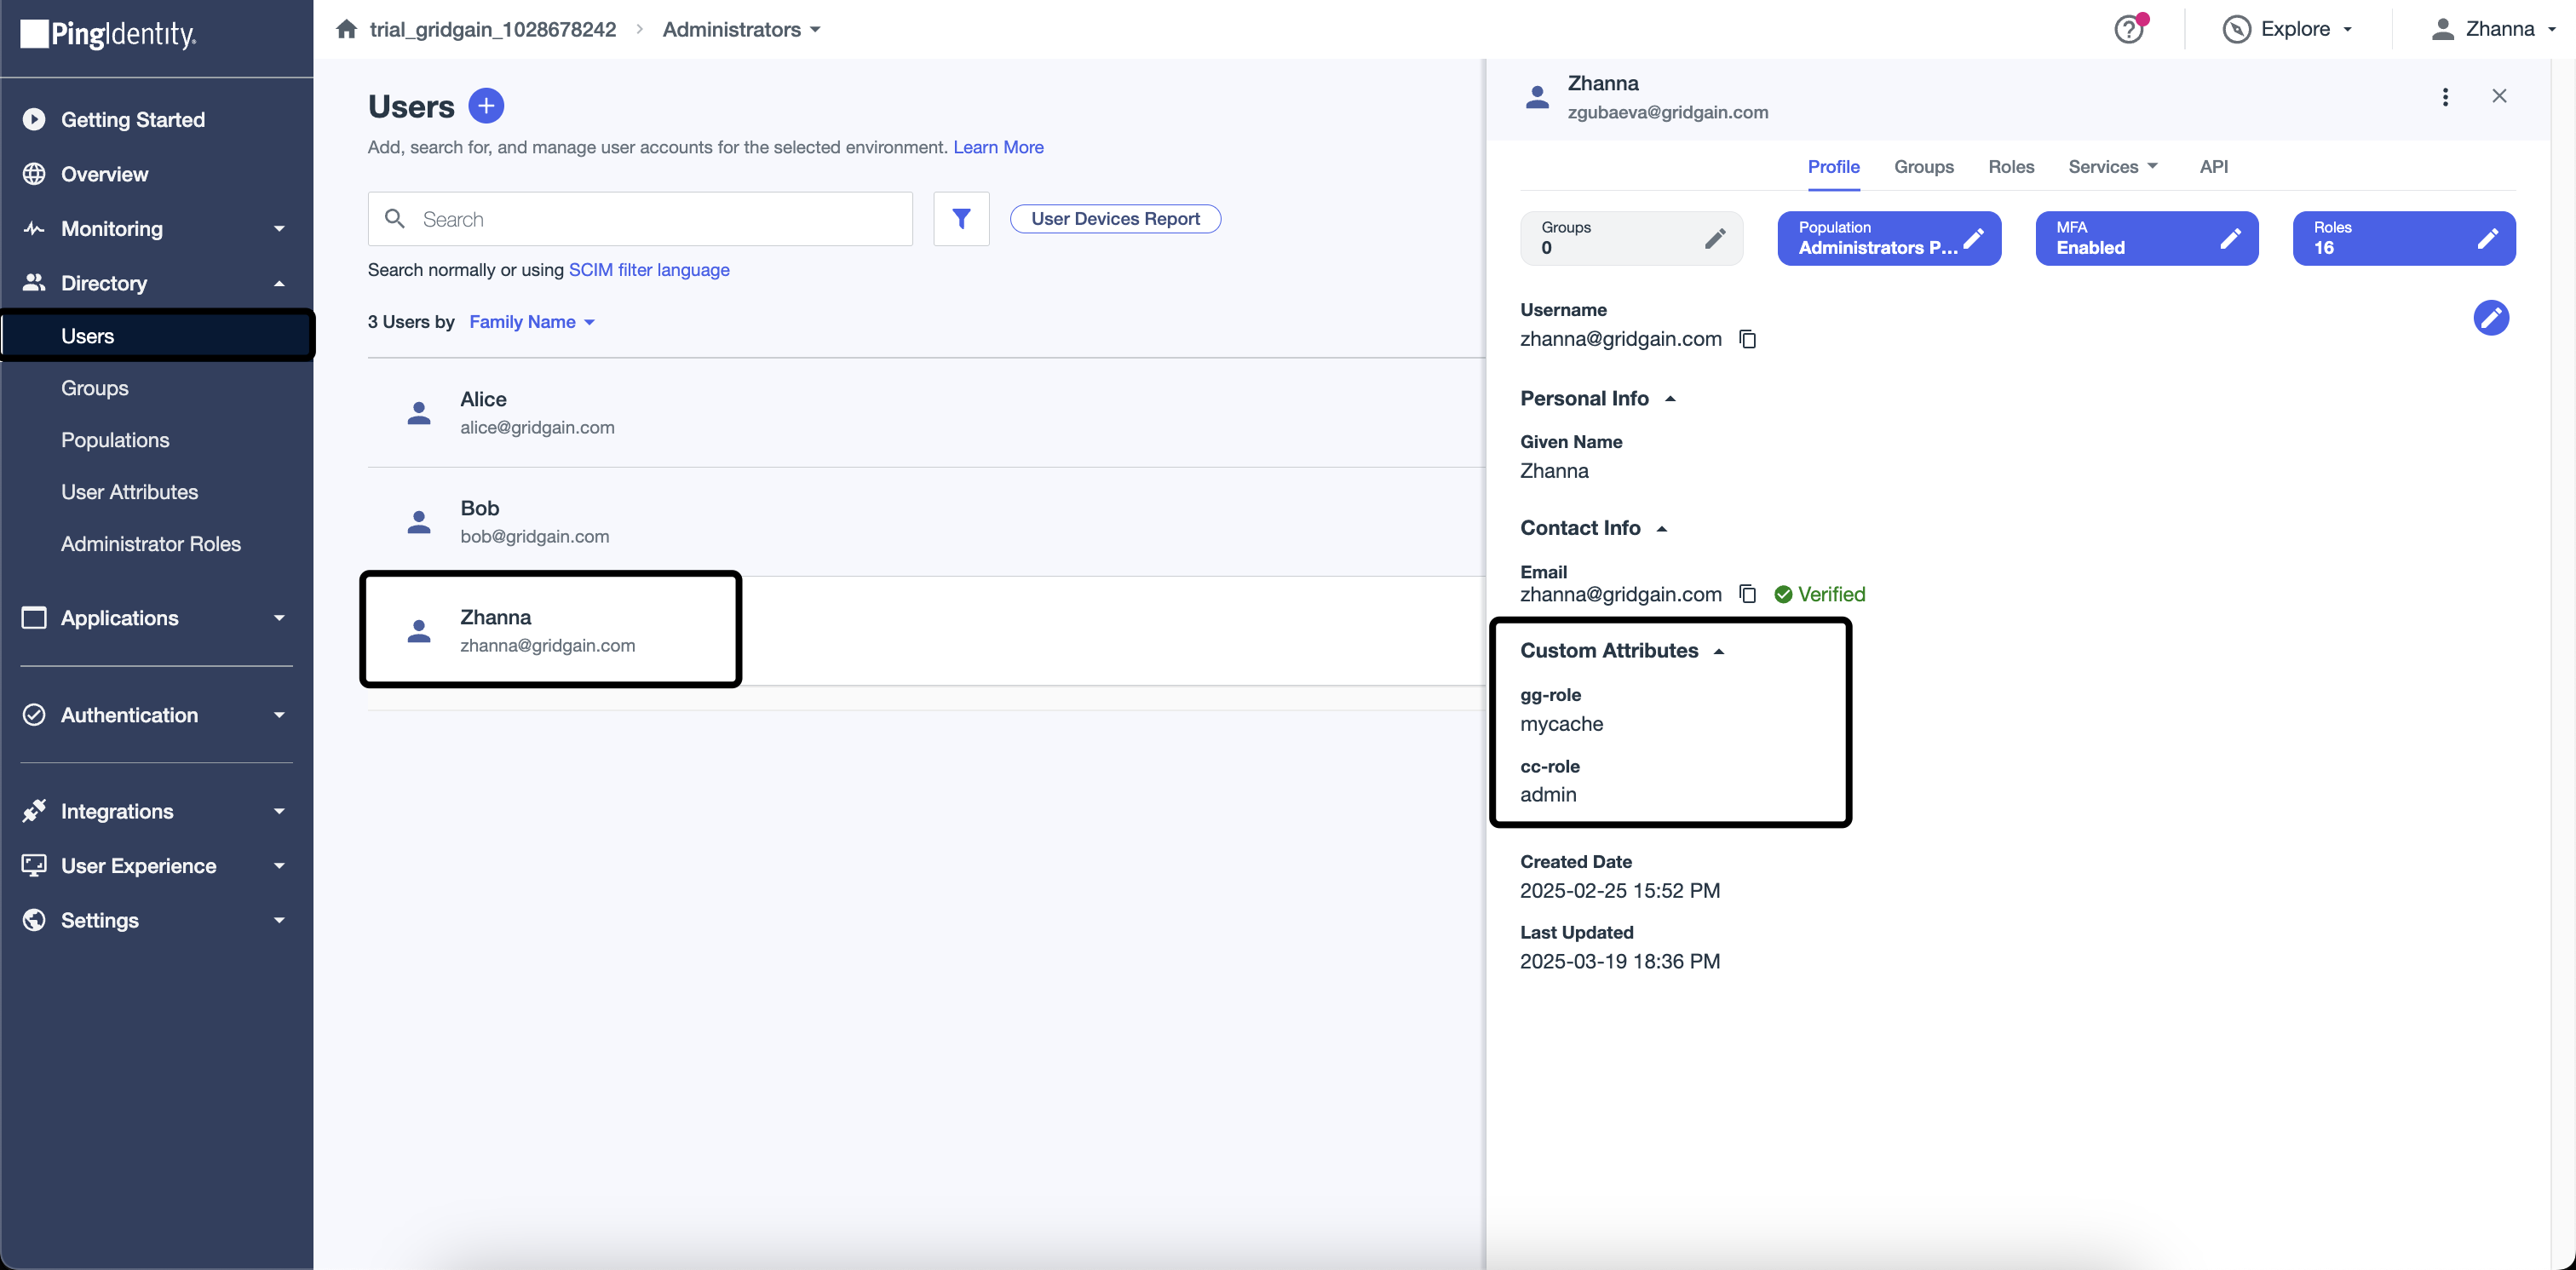
-
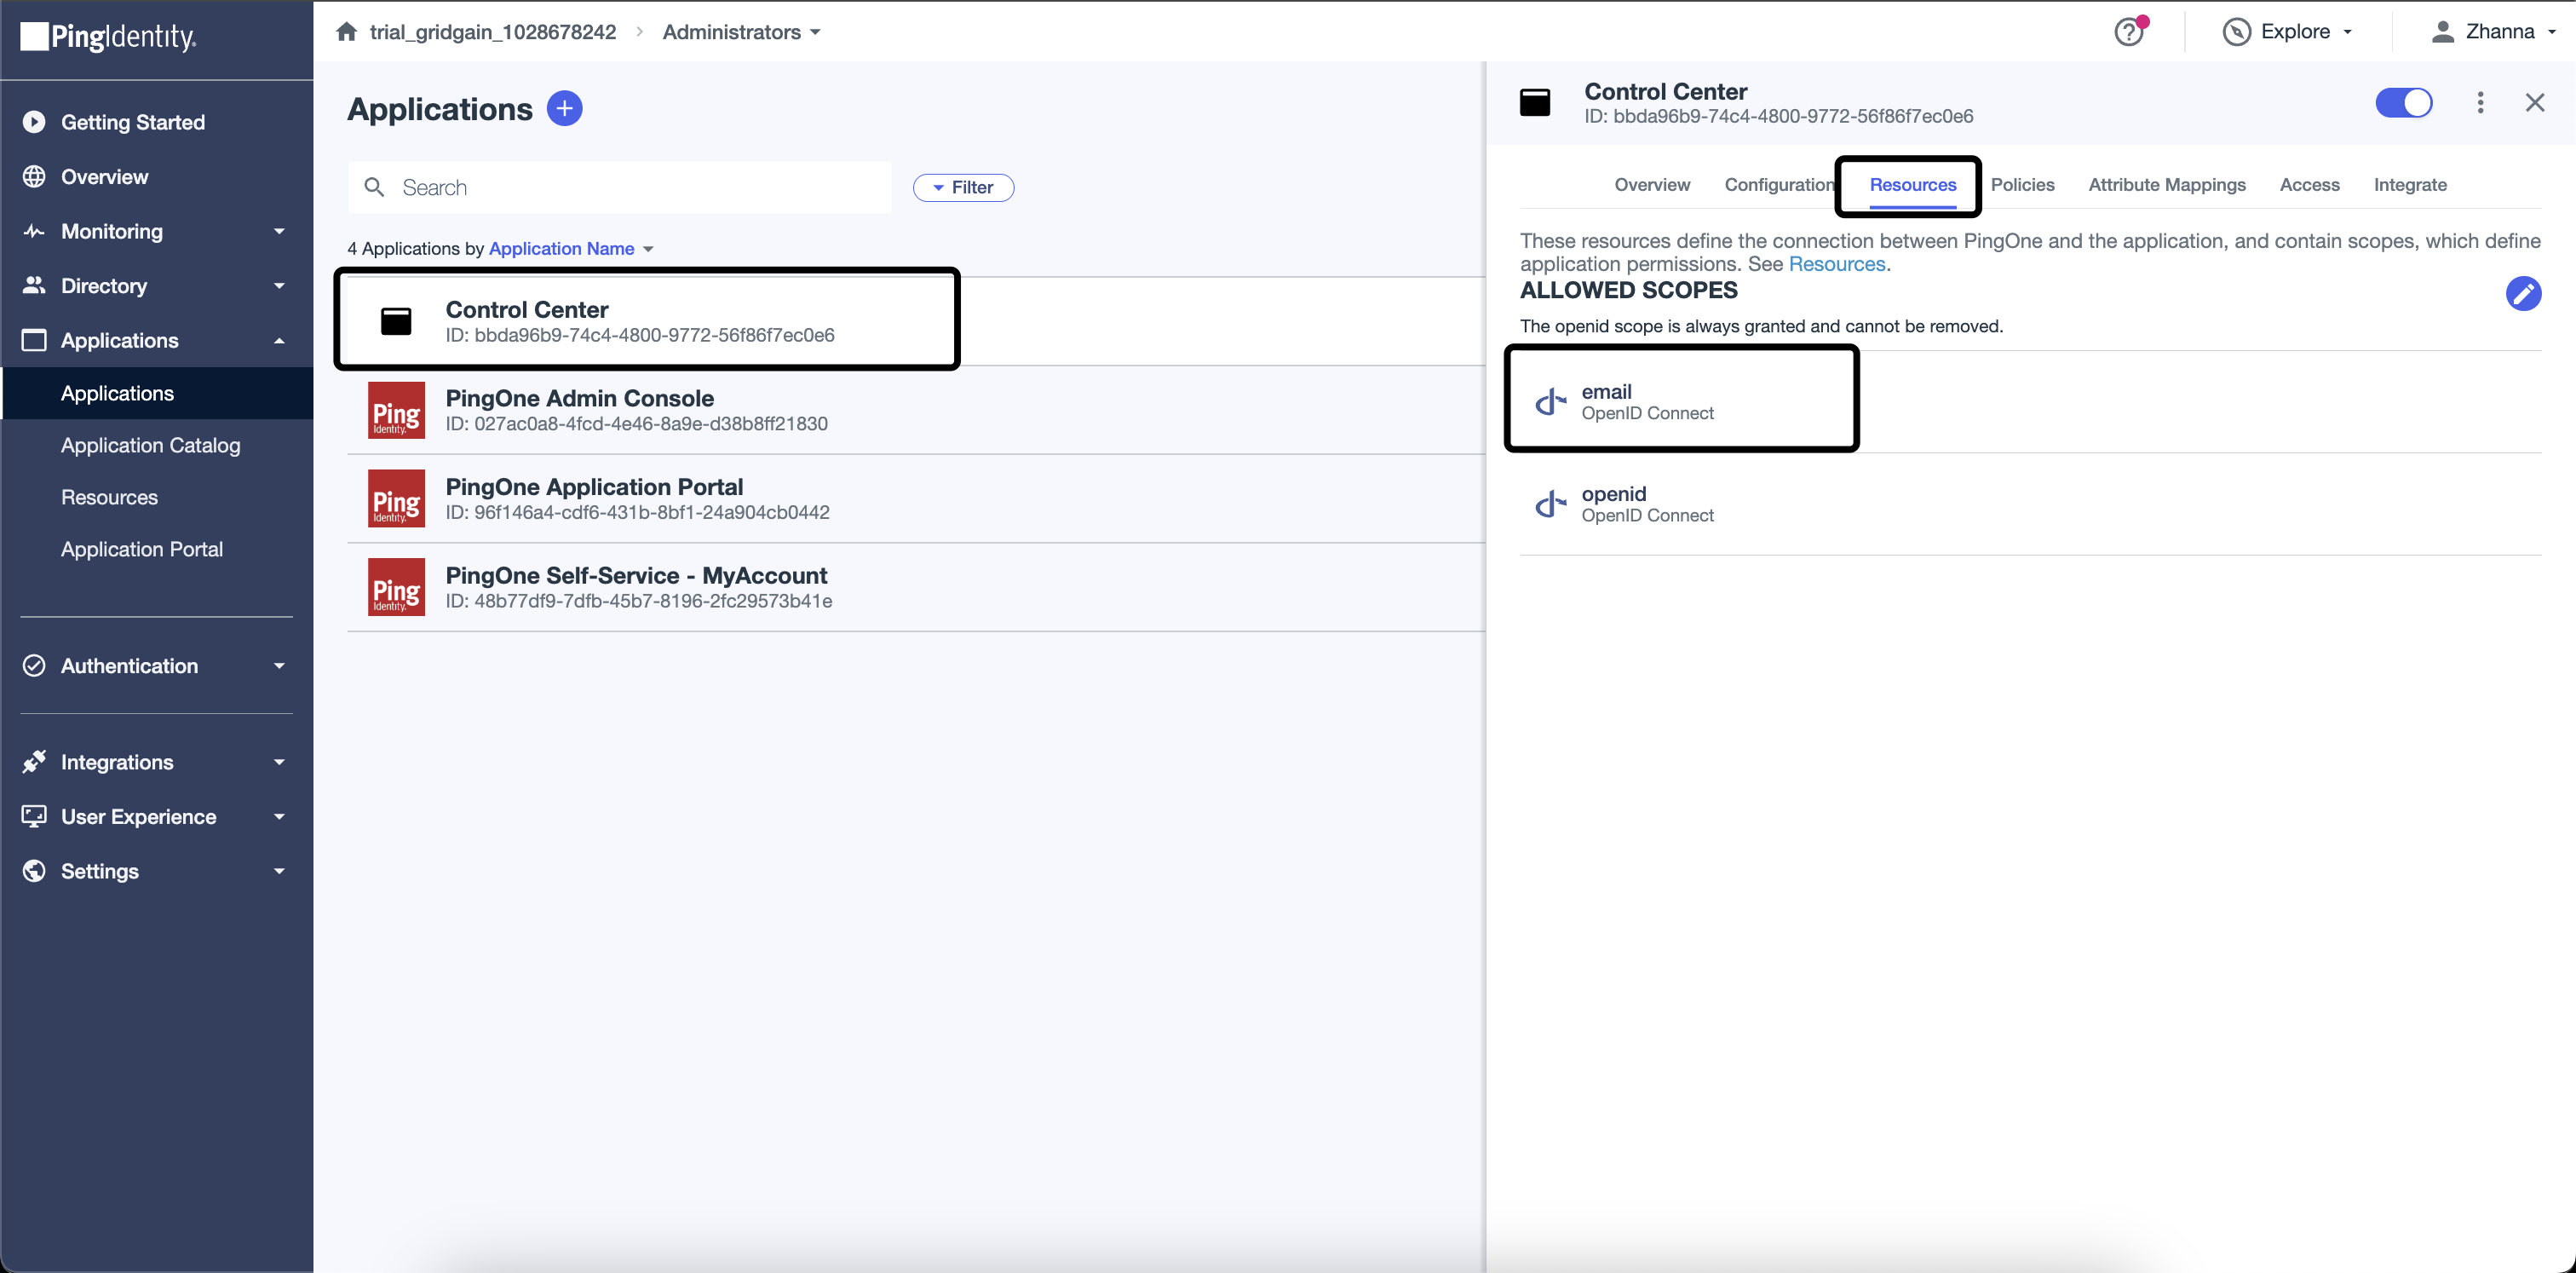
Add email to the allowed scope on the Resources tab.


Control Center Configuration
After completing the Ping configuration, set up Control Center via `application.properties`file. This file should be located in the Control Center root folder.
The account.oidc.rbac.enabled attribute settings permission towards Control Center based on a value in the cc-role attribute. The possible values are "admin", "regular" or "no-access".
All the values for spring.security.oauth2.client.xxx parameters are defined on the Overview tab in the Application.

account.oidc.rbac.enabled: true
account.oidc.rbac.attributeName: cc-role
spring.security.oauth2.client.registration.ping.client-id: {{client_id}}
spring.security.oauth2.client.registration.ping.client-secret: {{client_secret}}
spring.security.oauth2.client.provider.ping.authorization-uri: https://auth.pingone.eu/{{id}}/as/authorize
spring.security.oauth2.client.provider.ping.token-uri: https://auth.pingone.eu/{{id}}/as/token
spring.security.oauth2.client.provider.ping.jwk-set-uri: https://auth.pingone.eu/{{id}}/as/jwks
spring.security.oauth2.client.provider.ping.user-info-uri: https://auth.pingone.eu/{{id}}/as/userinfo
GridGain 8.9 Cluster Configuration
Permissions on cluster actions also can be validated via cluster configuration and the attribute, which is defined as the claimName. In this configuration the attribute value is
gg-role.
    <!-- Credentials for the current node. -->
    <bean id="node.cred" class="org.apache.ignite.plugin.security.SecurityCredentials">
        <constructor-arg value="admin"/>
        <constructor-arg value="admin_password"/>
    </bean>

    <!-- Credentials for the current node. -->
    <bean id="cc_login.user.cred" class="org.apache.ignite.plugin.security.SecurityCredentials">
        <constructor-arg value="cc_password"/>
        <constructor-arg value="default"/>
    </bean>

    <bean id="ignite.cfg" class="org.apache.ignite.configuration.IgniteConfiguration">
  <property name="authenticator">
      <bean class="org.gridgain.grid.security.composite.CompositeAuthenticator">
          <property name="authenticators">
              <list>
                  <bean class="org.gridgain.grid.security.passcode.PasscodeAuthenticator">
    <!-- Set acl provider. -->
    <property name="aclProvider">
        <bean class="org.gridgain.grid.security.passcode.AuthenticationAclBasicProvider">
            <constructor-arg>
                <map>
                    <entry key-ref="node.cred" value="{defaultAllow:true}"/>
                    <entry key-ref="cc_login.user.cred" value="{defaultAllow:true, {cache:'allow_cache', permissions:[CACHE_READ, CACHE_PUT, CACHE_REMOVE]},{cache:'deny_cache', permissions:[]}}"/>
                </map>
            </constructor-arg>
        </bean>
    </property>
                  </bean>
                  <!-- Set OpenID provider. -->
                  <bean class="org.gridgain.grid.security.oidc.OpenIdAuthenticator">
    <property name="userInfoUrl" value="https://auth.pingone.eu/{{id}}/as/userinfo"/>
    <property name="claimName" value="gg-role"/> <!-- The "value" may be a custom one, but the same name should be defined as a Custom Attribute in your Ping Application. -->
    <property name="permissionsJson">
        <map>
            <entry key="default" value="{defaultAllow:true}"/>
            <entry key="mycache" value="{defaultAllow:false, {cache:'MYCACHE*',permissions:['CACHE_READ','CACHE_DESTROY']}}"/>
        </map>
    </property>
                  </bean>
              </list>
          </property>
      </bean>
  </property>

  <property name="securityCredentialsProvider">
      <bean class="org.apache.ignite.plugin.security.SecurityCredentialsBasicProvider">
          <constructor-arg ref="node.cred"/>
      </bean>
  </property>
Work with Control Center
With everything set up it is time to check how RBAC and Cluster Actions work for user, who was authenticated via PingOne.
-
Go to Control Center and select PingOne as a way of authentication.

If the user has
cc-role=admin, then the Administration tab is going to be visible.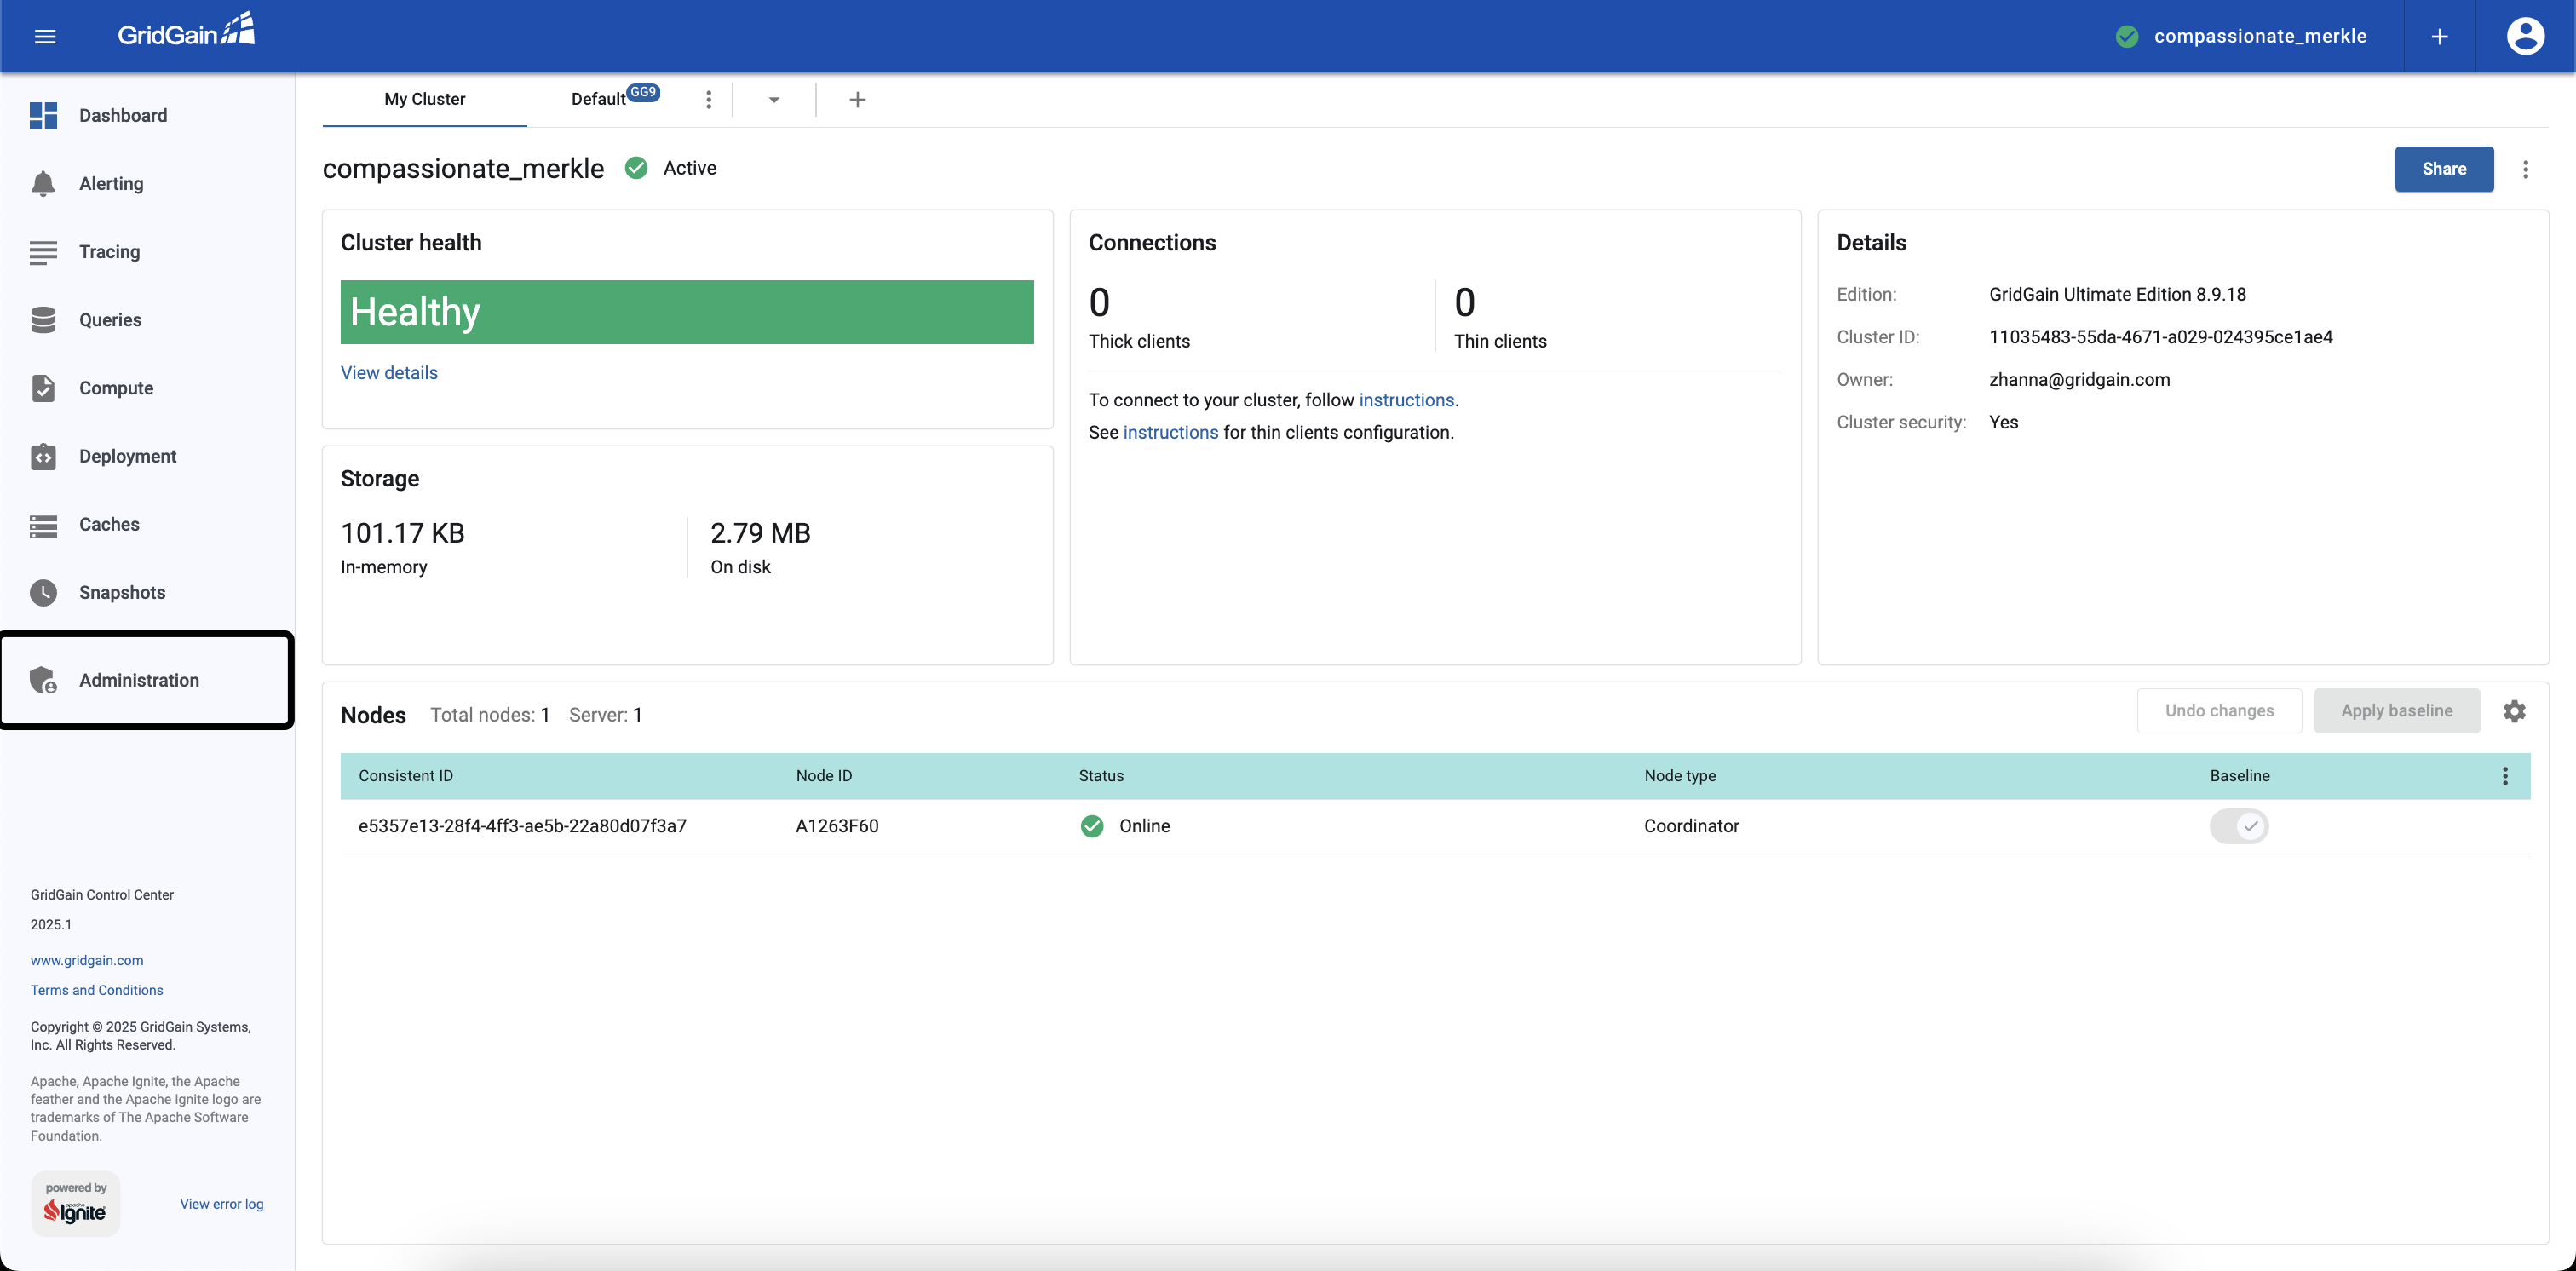
-
Attach a GridGain cluster with the
CompositeAuthenticatorin its configuration. -
Try to Rename the attached cluster.
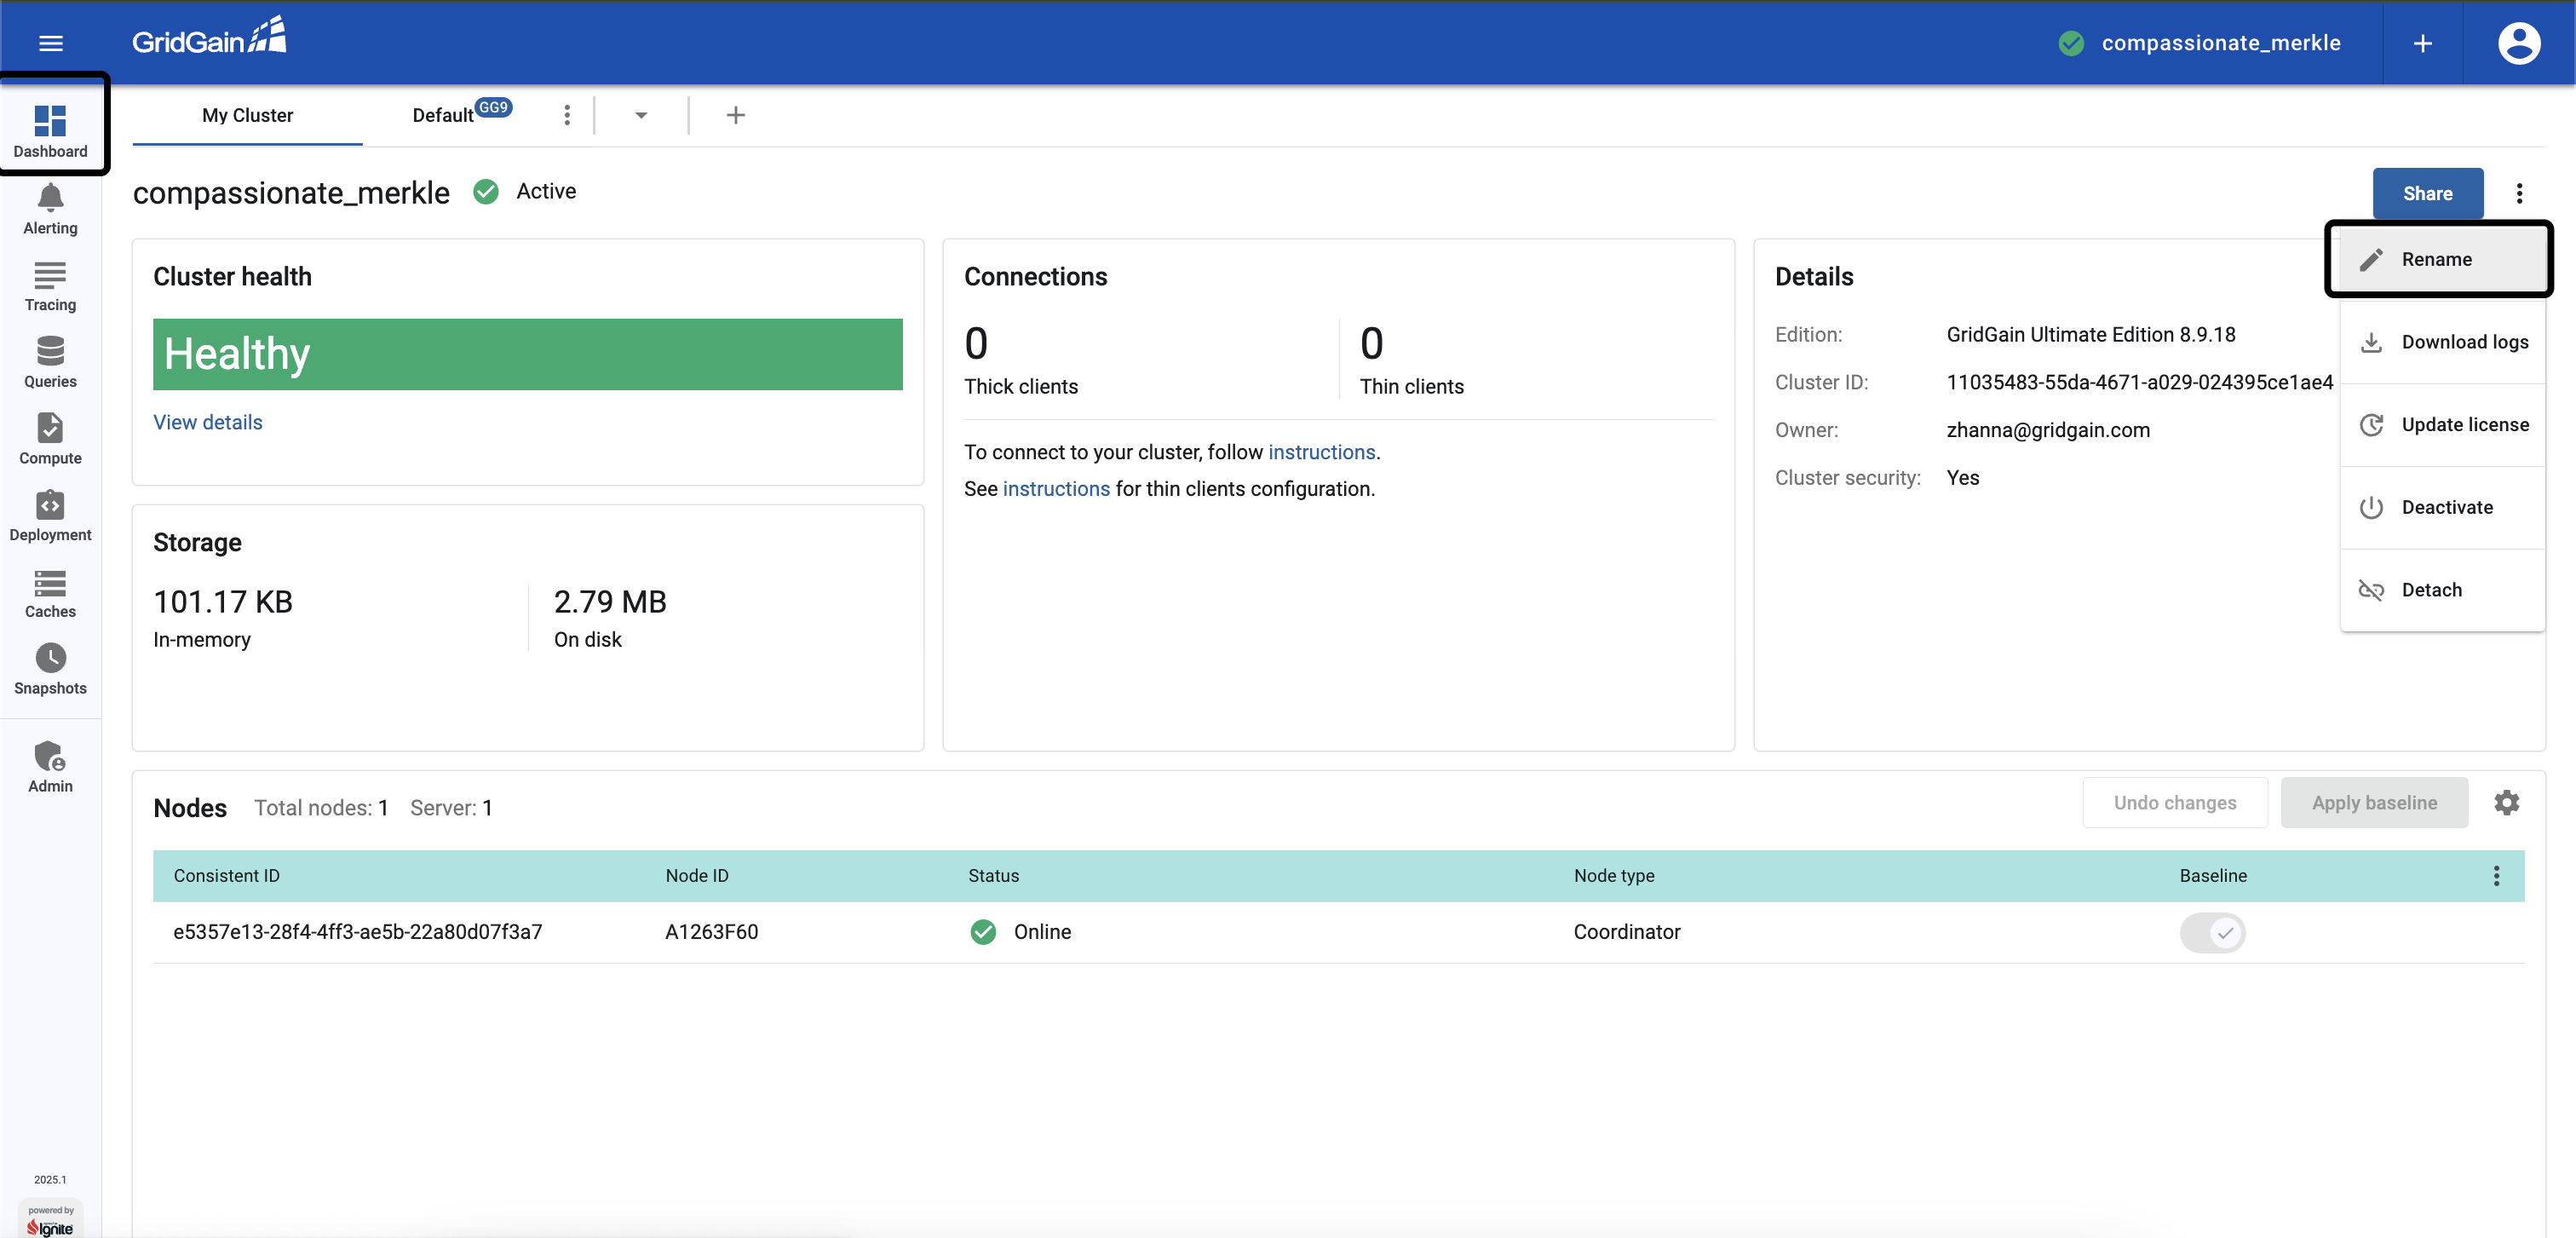
-
Select the Authenticate via ping option and click Sign In. The cluster will check user’s permissions.
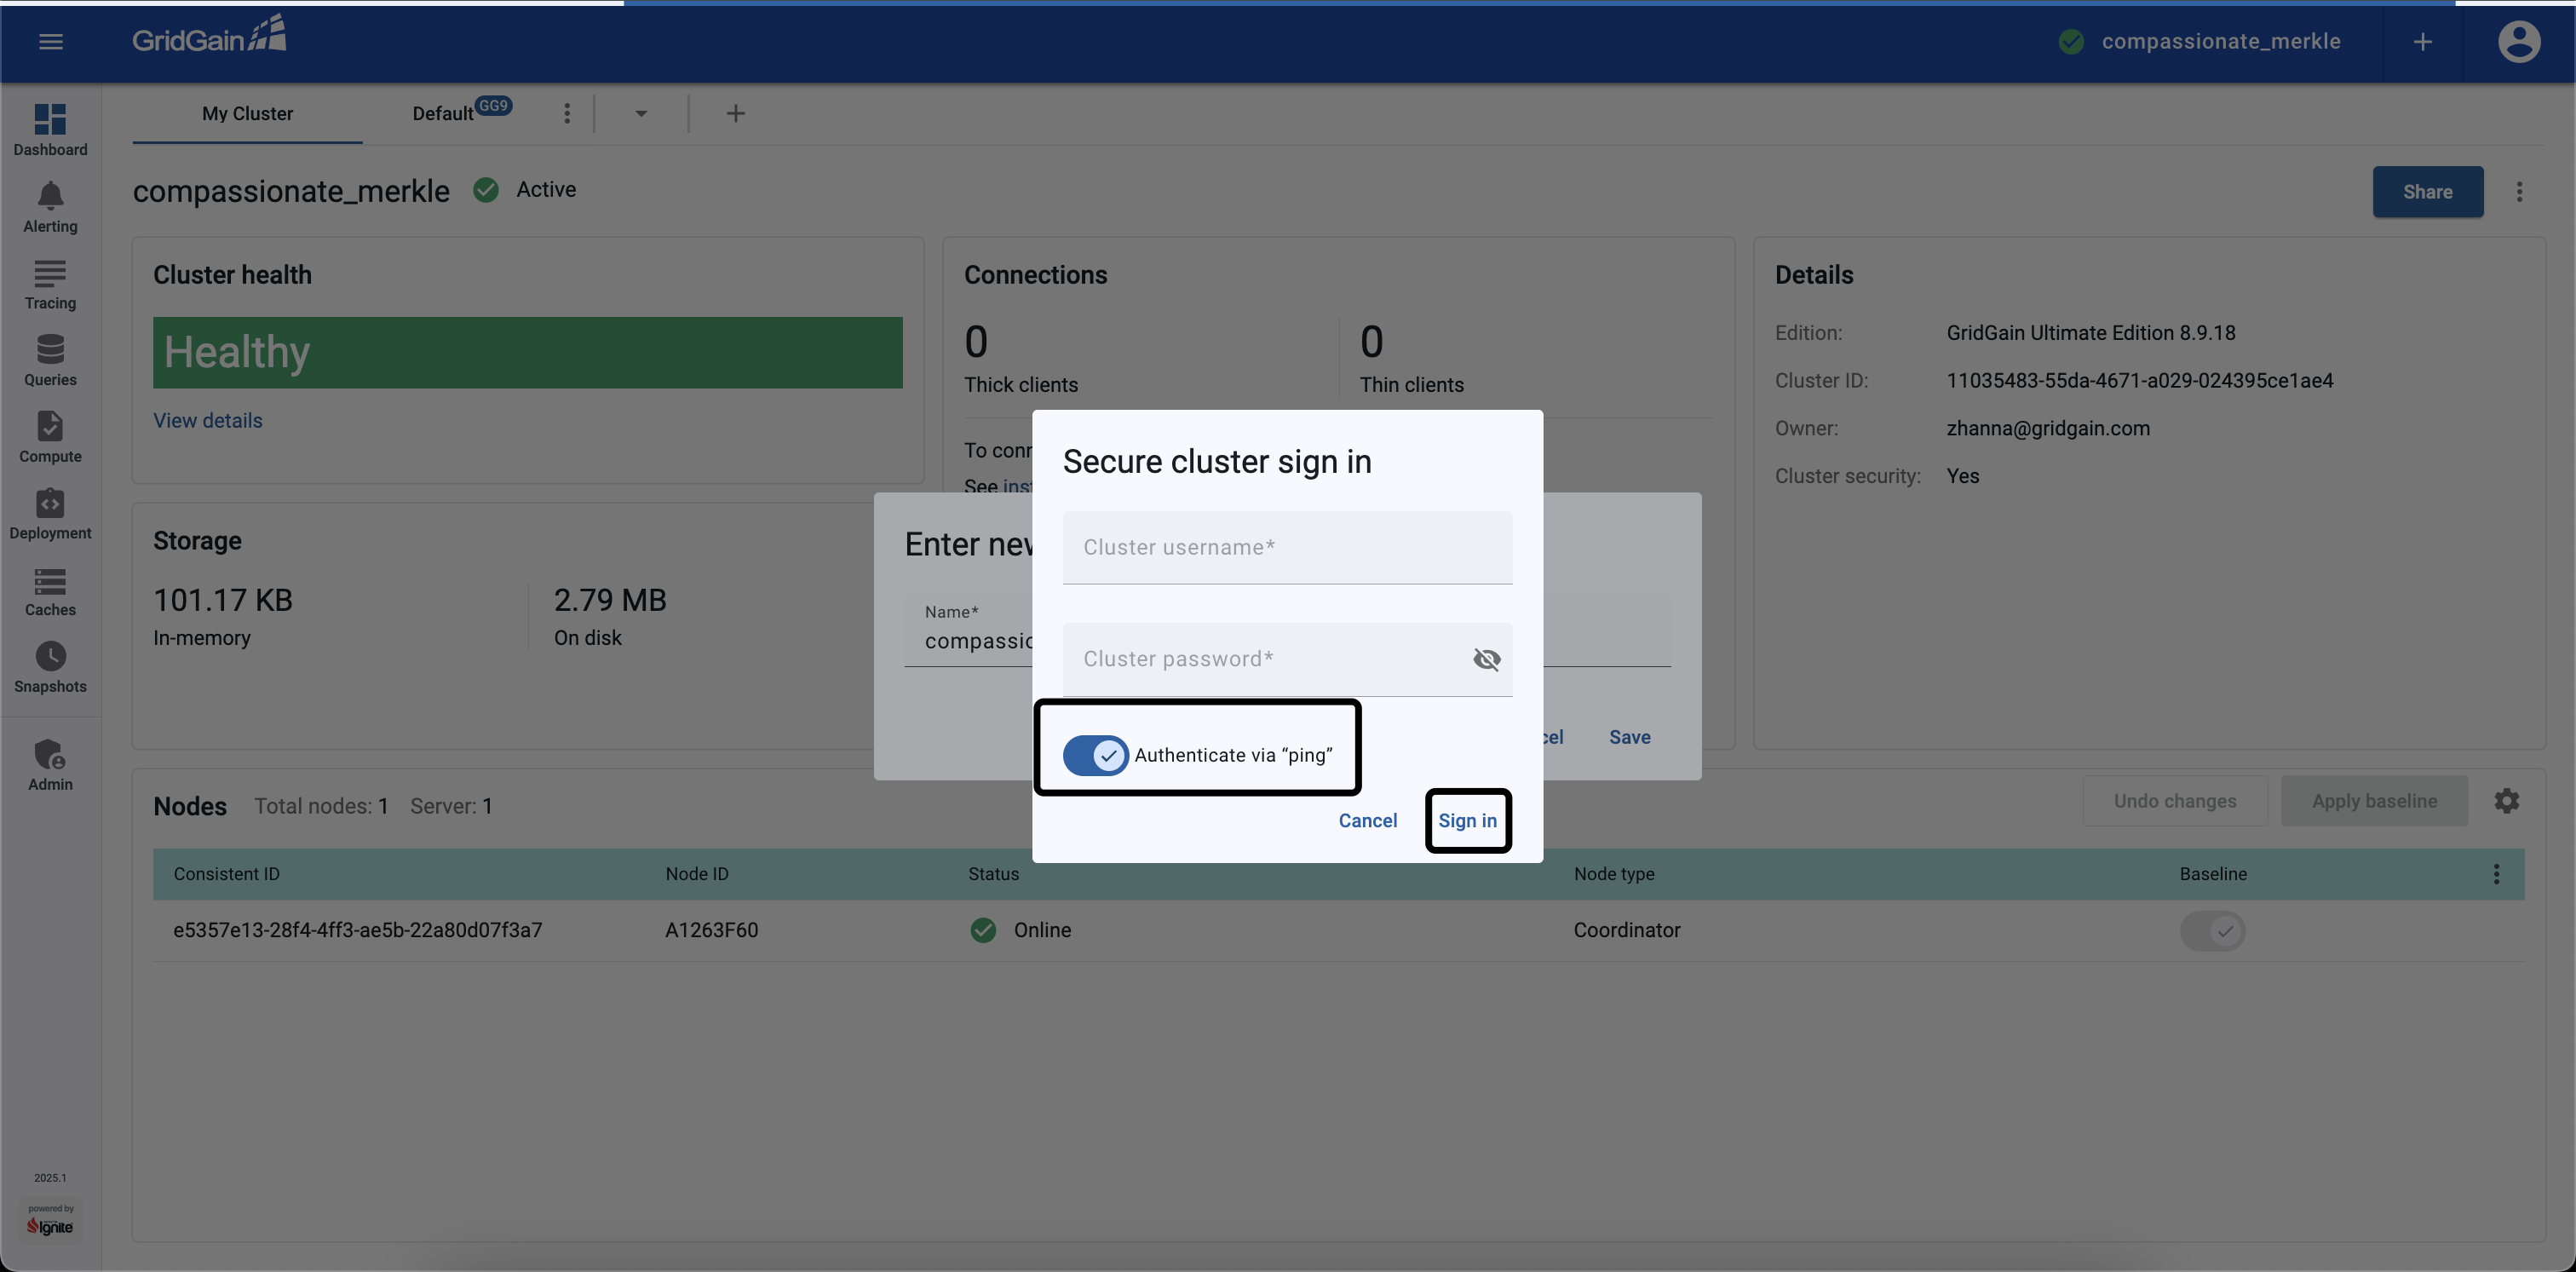
If the user has the previously configured
gg-role=mycacherole, the action is prohibited and the error message is shown, as the role does not allow renaming clusters.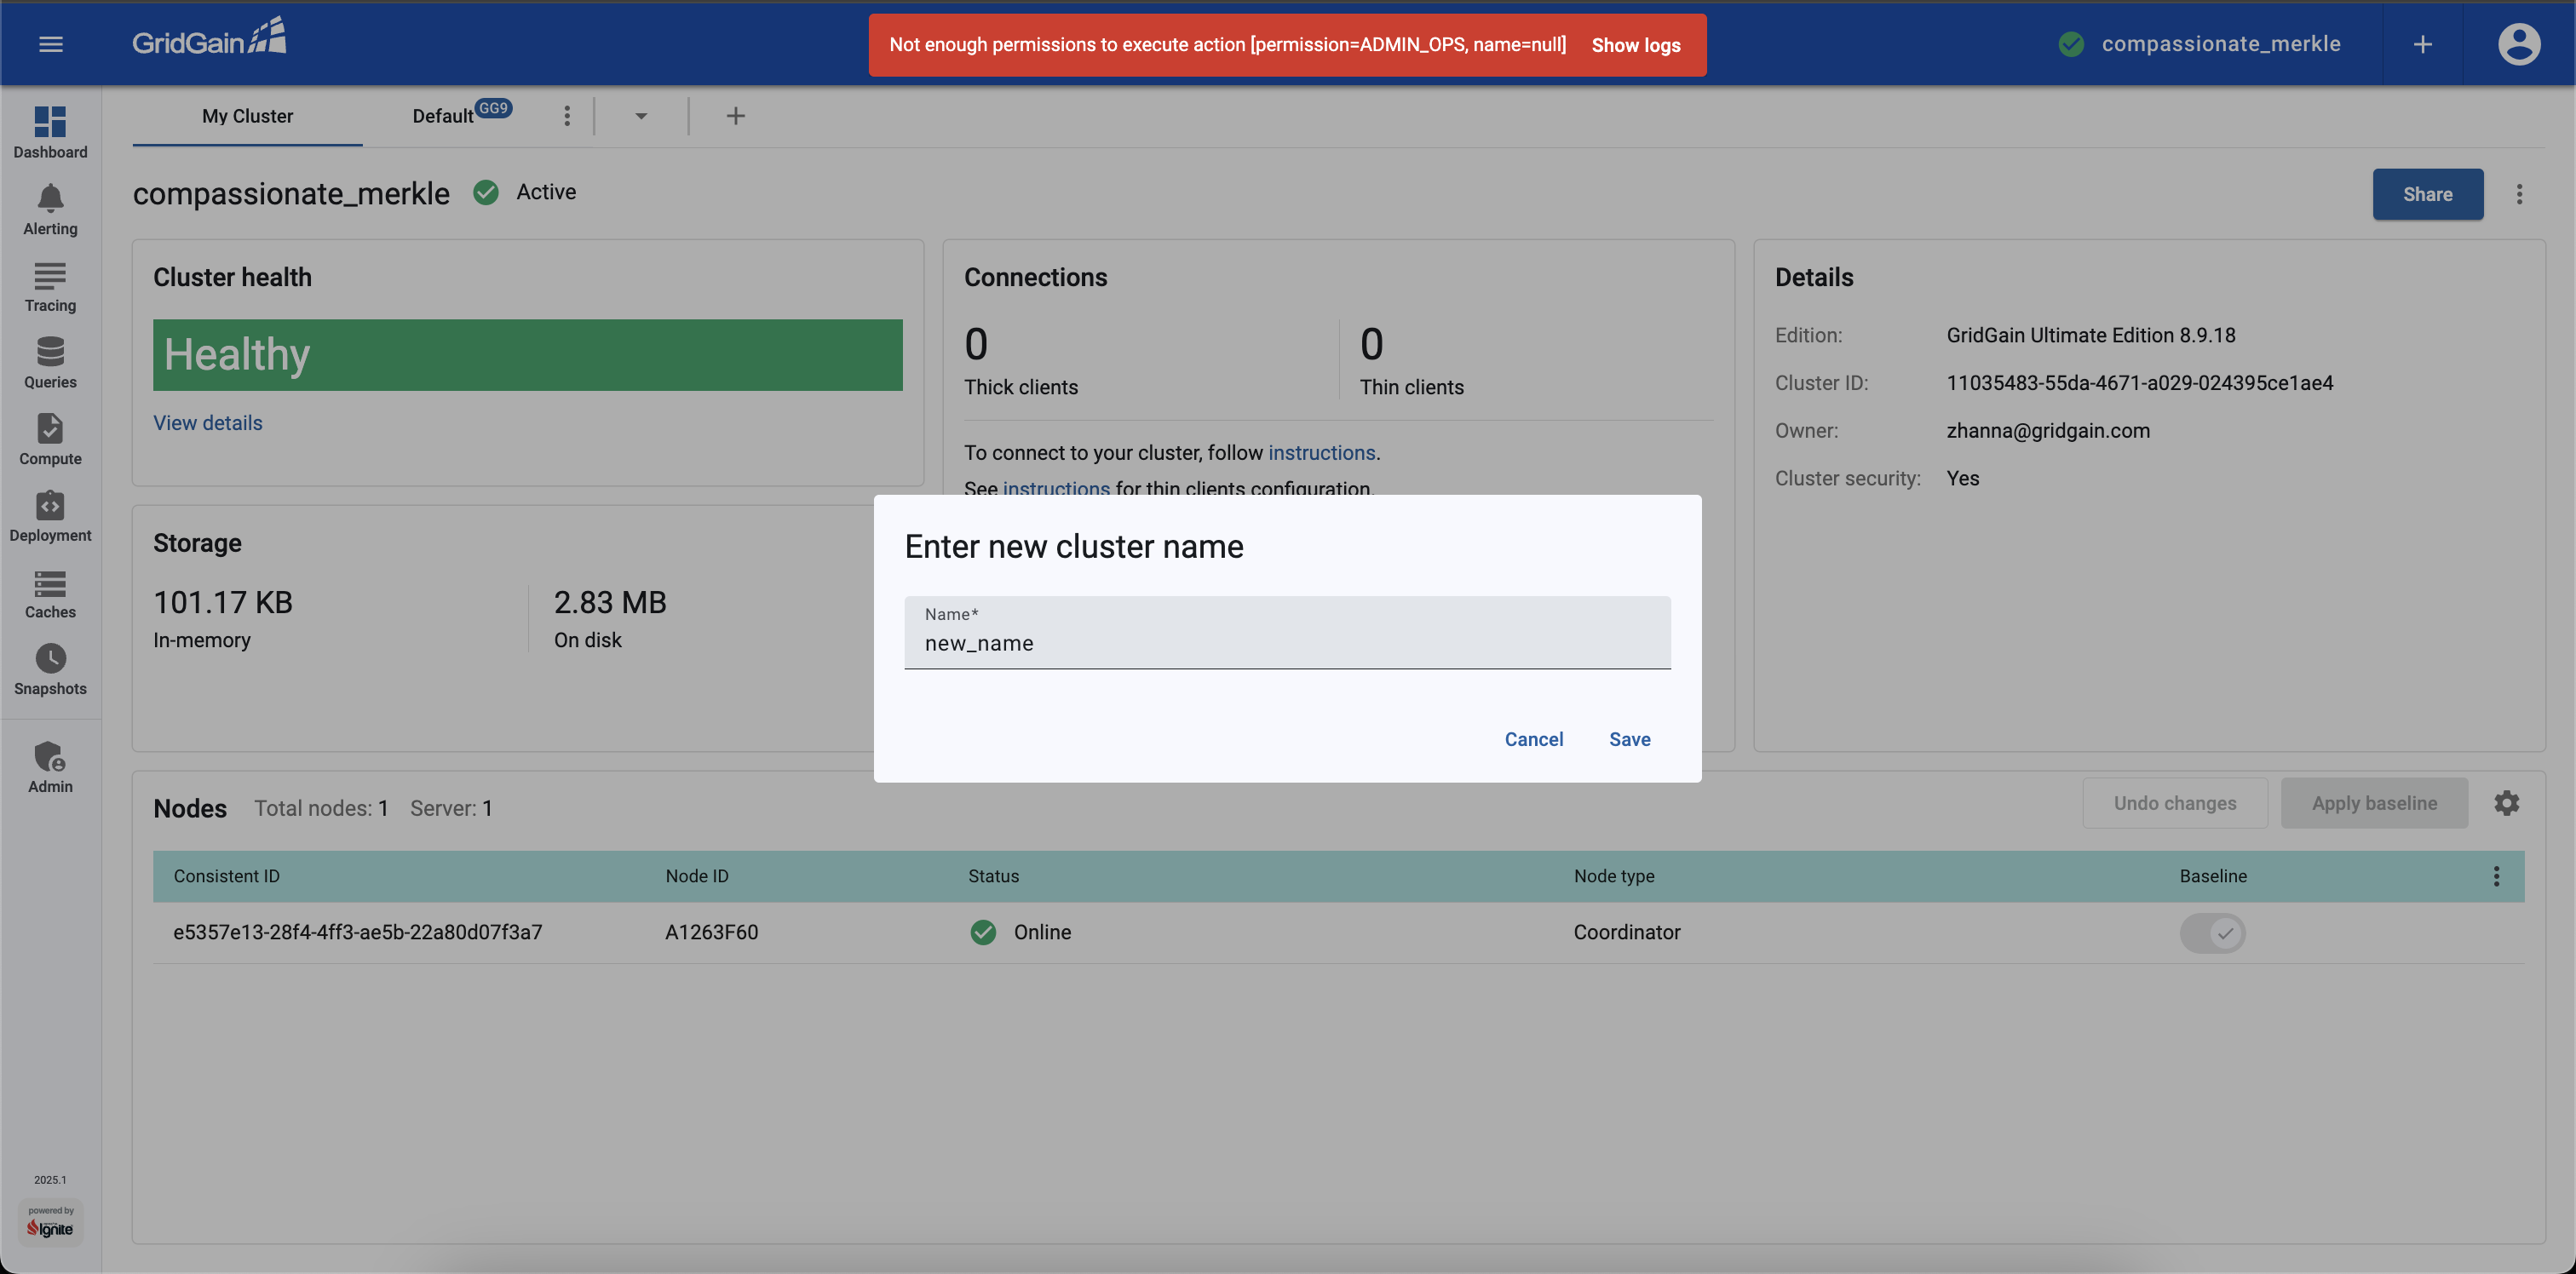


© 2025 GridGain Systems, Inc. All Rights Reserved. Privacy Policy | Legal Notices. GridGain® is a registered trademark of GridGain Systems, Inc.
Apache, Apache Ignite, the Apache feather and the Apache Ignite logo are either registered trademarks or trademarks of The Apache Software Foundation.