GridGain Kafka Connector on Amazon MSK
Introduction
GridGain, derived from the open-source Apache Ignite platform, is a leading in-memory computing and data management platform.
Apache Kafka is an open-source, distributed event streaming platform that can process and store large amounts of real-time data.
GridGain offers two options to integrate with Kafka:
-
Streaming, where you write your own custom code using the Apache Ignite Kafka Streamer API
-
GridGain Kafka Connector, which is a no-code, configuration-driven, scalable, resilient, DevOps-friendly, certified solution
In this tutorial, we present the second option - GridGain Kafka Connector. We demonstrate Kafka running on Amazon MSK with GridGain Kafka Connector running on EC2. The GridGain Kafka Connector sources and sinks data between MSK and a GridGain cluster running in AWS. This is a basic tutorial intended to get you started with Amazon MSK. For detailed configurations and advanced topics, refer to the official AWS documentation.
Step 1: Set up Your Environment
-
Navigate to the AWS Management Console.
-
Sign in with your AWS credentials.
-
Select your region (make sure you’re in the correct AWS region, the one where you want to create your MSK cluster).

Step 2: Create an MSK Cluster
-
In the AWS Management Console, search for MSK and select Amazon Managed Streaming for Apache Kafka.
The Amazon MSK Console opens.
-
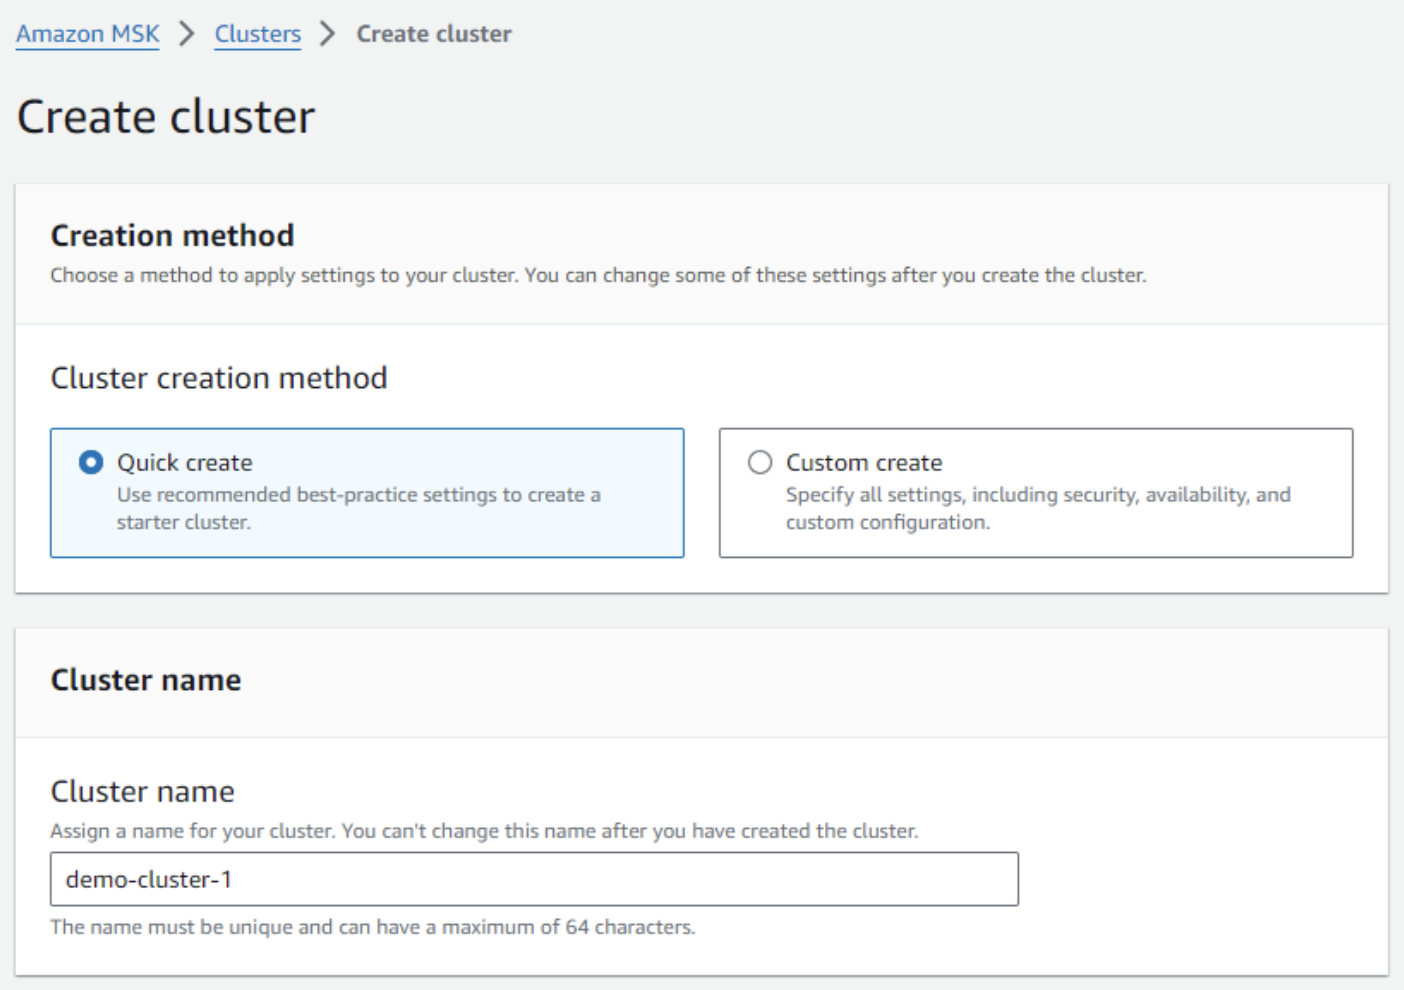
Click Create cluster.

-
In Creation method, select:
-
Quick create to use default settings, or
-
Custom create to define custom settings.
-
-
Cluster name: Enter a name for your cluster.

-
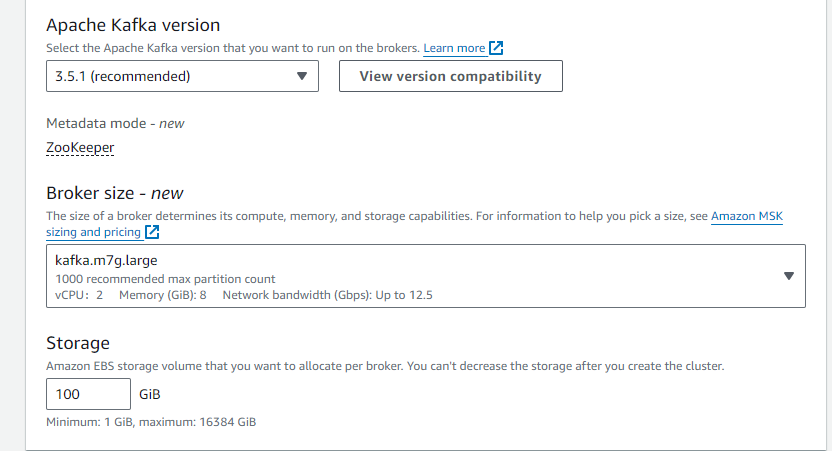
Apache Kafka version: Select the version of Apache Kafka you want to use.
-
In Broker configuration:
-
From Instance type, select the instance type for your Kafka brokers.
-
Specify the Number of brokers for your cluster.
-
Specify the Storage volume per broker.
-
-
In Networking:
-
VPC: Select the VPC where the cluster will be launched.
-
Subnets: Select subnets for the brokers.
-
Security groups: Select security groups for the brokers.
-
Select the Monitoring option (e.g., JMX Exporter or Prometheus).
-
Optionally, add Tags to your cluster to facilitate cluster management.
-
-
Review your settings and click Create cluster.
Step 3: Create an IAM Role
-
Open the IAM Console.

-
Select MSK as the trusted entity.
-
Attach the
AmazonMSKFullAccesspolicy. -
Name the role and create it.
Step 4: Create a Client Machine
-
Launch an EC2 Instance:
-
Open the EC2 Console.

-
Choose Amazon Linux 2 AMI.
-
Select the instance type.
-
Configure instance details, add storage, and tag your instance.
-
Configure the security group to allow SSH (port 22) and Kafka ports (9092, 2181).
-
-
Use your key pair to SSH into the instance.
Step 5: Configure Clients and Connect to the Cluster
-
Ensure your client machines (EC2 instances) are in the same VPC as the MSK cluster (or have network access to that VPC).
-
Install Apache Kafka Tools on your client machine. For example:
wget https://archive.apache.org/dist/kafka/2.7.0/kafka_2.12-2.7.0.tgz tar -xzf kafka_2.12-2.7.0.tgz cd kafka_2.12-2.7.0 -
In the MSK console, go to your cluster details page and copy the Bootstrap servers.

-
Use the Kafka Tools to create a topic:
bin/kafka-topics.sh --create --bootstrap-server <Bootstrap-Servers> --replication-factor 3 --partitions 1 --topic MyFirstTopic -
Use Kafka Producer to send messages to the topic:
bin/kafka-console-producer.sh --broker-list <Bootstrap-Servers> --topic MyFirstTopic -
Type a few messages and press [Enter].
-
Use Kafka Consumer to read messages from the topic:
bin/kafka-console-consumer.sh --bootstrap-server <Bootstrap-Servers> --topic MyFirstTopic --from-beginningThis verifies that the MSK setup works as intended.
Next, we’ll use the GridGain Kafka Connector instead of the Kafka Producer/Consumer to sink data into GridGain caches.
Step 6: Set Up GridGain on AWS
Set up a GridGain Enterprise Edition or Ultimate Edition instance on AWS using the Installation Guide.
Step 7: Configure GridGain Kafka Connector
-
Download the GridGain Enterprise Edition or Ultimate Edition package:
-
Create two Connector Property files:
gridgain-kafka-connect-source.propertiesandgridgain-kafka-connect-sink.properties.-
Example Source Properties:
name=gridgain-kafka-connect-source connector.class=org.gridgain.kafka.source.IgniteSourceConnector igniteCfg=IGNITE_CONFIG_PATH/ignite-server-source.xml -
Example Sink Properties:
name=gridgain-kafka-connect-sink
topics=topic1,topic2,topic3
connector.class=org.gridgain.kafka.sink.IgniteSinkConnector
igniteCfg=IGNITE_CONFIG_PATH/ignite-server-sink.xml
-
-
In
$KAFKA_HOME/config/connect-distributed.properties, enter the Bootstrap servers you have copied in Step 5: Configure Clients and Connect to the Cluster.bootstrap.servers=<Bootstrap-Servers> -
To deploy the connector, transfer the property files and the GridGain Kafka Connector package to your EC2 instances.
-
Start the connector:
-
SSH into your EC2 instance and navigate to the Kafka installation directory.
-
Run the following commands:
$KAFKA_HOME/bin/connect-distributed.sh \
    $KAFKA_HOME/config/connect-distributed.properties \
    gridgain-kafka-connect-source.properties \
    gridgain-kafka-connect-sink.properties
-
-
Verify that the intended data appears in the cache:
-
Insert some messages into the Kafka topic.
-
Query the cache to make sure the data from the Kafka topic was inserted into the cache.
-
Step 8: Monitor and Manage Your Cluster
-
Open the Cloud Watch Console.
-
Monitor your cluster’s metrics, such as the like broker health, CPU utilization, etc.

-
Adjust the number of brokers or the storage volume as needed.

-
Manage security settings, such as IAM roles and policies, encryption in transit, and client authentication.

Step 9: Clean Up
-
Optionally, delete the topics you have created:
bin/kafka-topics.sh --delete --bootstrap-server <Bootstrap-Servers> --topic MyFirstTopic -
In the Amazon MSK console, navigate to your cluster and click Delete.
© 2025 GridGain Systems, Inc. All Rights Reserved. Privacy Policy | Legal Notices. GridGain® is a registered trademark of GridGain Systems, Inc.
Apache, Apache Ignite, the Apache feather and the Apache Ignite logo are either registered trademarks or trademarks of The Apache Software Foundation.

