Attaching a GridGain 9 Cluster
This page explains how to attach a GridGain 9 cluster to GridGain Nebula.
You can attach as many clusters as your license supports.
Start the Cluster
Follow the GridGain 9 documentation to start the cluster.
Attach the Cluster to Nebula
By Using the Custom Connector
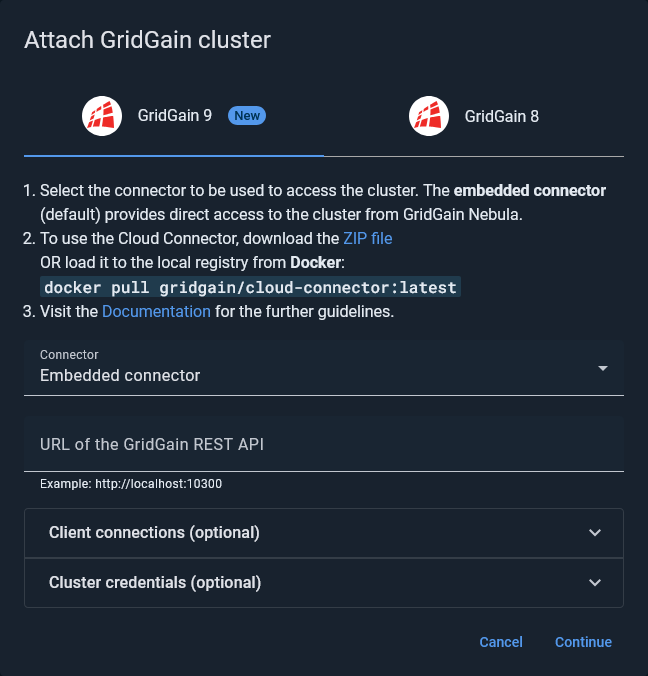
You can install the Cloud Connector tool to collect data from your cluster and send it to Nebula. In this case, you will not need to expose your cluster to Nebula, as the Connector can be run in your local network.
To attach the cluster to Nebula by using the embedded connector:
Install the Connector
Follow the Cloud Connector installation instructions.
Connect to the Cluster
-
Click the + icon on the Nebula toolbar and select Attach GridGain.
-
In the Attach GridGain cluster dialog that opens, select the GridGain 9 tab.
-
In the Connector field, select the name of your Connector.
-
Specify the URL of the GridGain cluster. The Connector will attempt to connect to the node on the specified URL from the machine it is running on.
-
If the node you are connecting to is hidden behind an entity like a NAT or a load balancer (see Configure Access Ports above), enter that entity’s address(es) in the Client connections field. The format is either
host:portorport. Make sure you have mapped the node address to the NAT/balancer address in the cluster. -
To enable SSL encryption in Nebula/cluster communications, select the SSL enabled check box.
-
If you are attaching a secure cluster, enter Username and Password that correspond to the credentials of one of the users included in the cluster configuration.
-
Click Continue.
-
In the subsequent dialog, click Attach.
The attached cluster displays in the My cluster screen.
If its status is Uninitialized, initialize the cluster to enable monitoring and management activities.
By Using the Embedded Connector
You can directly connect to GridGain Nebula without installing a connector tool. In this case, Nebula will access the node and collect required information from it. Your node will need to be exposed to Nebula cloud addresses for the connection to work.
To attach the cluster to Nebula by using the embedded connector:
Configure Access Ports
Open egress ports 10300 and 10800 to Nebula’s GCP Cloud NAT IP address - 35.209.75.152 - in the cluster firewall rules. The above address will be used to access the cluster from Nebula.
For AWS-based clusters:
-
Create a GridGain 9 cluster based on AWS EC2 instances.
-
Configure firewall rules using AWS security groups - add the
10300and10800ports to the security group’s inbound rules with35.209.75.152/32as the source.
Connect to the Cluster
-
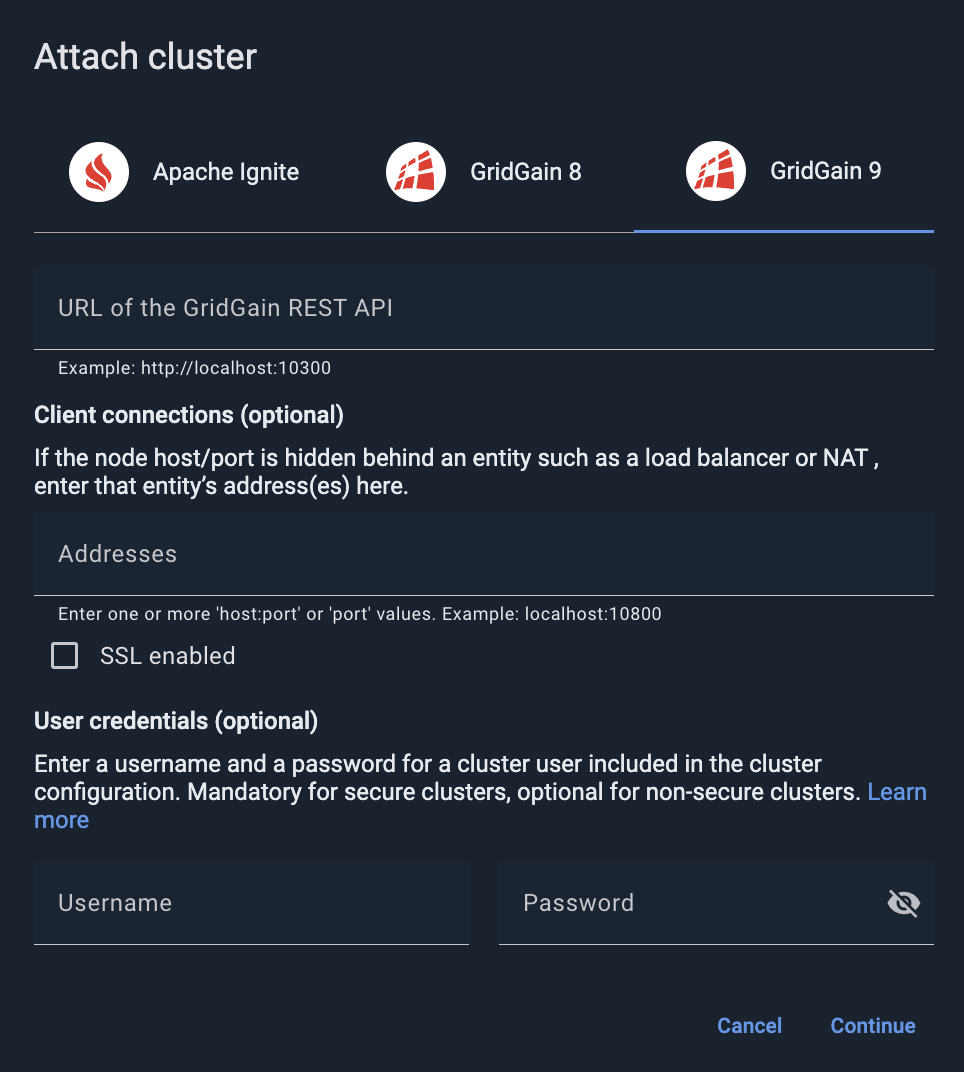
Click the + icon on the Nebula toolbar and select Attach GridGain.
-
In the Attach GridGain cluster dialog that opens, select the GridGain 9 tab.
-
In the Connector field, select Embedded connector.
-
Specify the URL of the GridGain cluster. Nebula will attempt to connect to the node on the specified URL from the cloud.
-
If the node you are connecting to is hidden behind an entity like a NAT or a load balancer (see Configure Access Ports above), enter that entity’s address(es) in the Client connections field. The format is either
host:portorport. Make sure you have mapped the node address to the NAT/balancer address in the cluster. -
To enable SSL encryption in Nebula/cluster communications, select the SSL enabled check box.
-
If you are attaching a secure cluster, enter Username and Password that correspond to the credentials of one of the users included in the cluster configuration.
-
Click Continue.
-
In the subsequent dialog, click Attach.
The attached cluster displays in the My cluster screen.
If its status is Uninitialized, initialize the cluster to enable monitoring and management activities.
© 2025 GridGain Systems, Inc. All Rights Reserved. Privacy Policy | Legal Notices. GridGain® is a registered trademark of GridGain Systems, Inc.
Apache, Apache Ignite, the Apache feather and the Apache Ignite logo are either registered trademarks or trademarks of The Apache Software Foundation.